

How to Clean Unlacquered Brass Cabinet Hardware (2026)
Learn exactly how to clean unlacquered brass cabinet hardware in 2026 — soap for routine care, a vinegar paste for tarnish, and wax to slow future oxidation.

Unlacquered brass cabinet hardware looks incredible — right up until it doesn't. Grease, fingerprints, and mineral deposits cloud the warm patina fast, and the wrong cleaner can strip the finish permanently. This guide walks you through exactly how to clean unlacquered brass cabinet hardware in 2026, what supplies you need, and the mistakes that turn a 10-minute job into a replacement order.
Shop the finish
Every unlacquered brass knob and pull we carry, in one place — filter by size, style, and brand.
Browse Unlacquered Brass Cabinet Hardware →TL;DR: Unlacquered brass is raw metal — it patinas intentionally and cleans differently than lacquered or coated hardware. In 2026, the standard method is mild dish soap for routine cleaning, a salt-and-flour paste or lemon-and-salt rub for tarnish, and a thin coat of Renaissance Wax or paste wax to slow future oxidation. Never use commercial brass polishes formulated for lacquered brass, abrasive scrubbers, or bleach-based products. The process takes under 15 minutes per piece.
Shop the picks from this guide
In stock at Knobs.co · Free shipping on hardware orders $99+ · 110% price match
-
 Alno
Alno A1032 1'' Brass Cabinet KnobUnlacquered Brass
Alno
Alno A1032 1'' Brass Cabinet KnobUnlacquered Brass
$13.46
$14.95 -
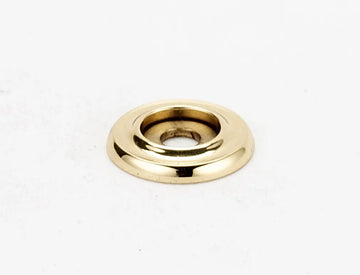 Alno
Alno A615 Brass Cabinet BackplateUnlacquered Brass / 1''
Alno
Alno A615 Brass Cabinet BackplateUnlacquered Brass / 1''
$6.26
$6.95 -
 Alno
Alno A726 Charlie's 3 1/2'' CC Cabinet PullUnlacquered Brass / 3''
Alno
Alno A726 Charlie's 3 1/2'' CC Cabinet PullUnlacquered Brass / 3''
$19.76
$21.95 -
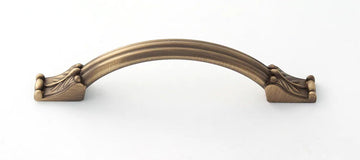 Alno
Alno A1476 Fiore 3 1/2'' CC Brass Cabinet PullUnlacquered Brass / 3''
Alno
Alno A1476 Fiore 3 1/2'' CC Brass Cabinet PullUnlacquered Brass / 3''
$21.56
$23.95 -
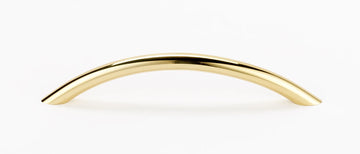 Alno
Alno A1298 128mm 5'' CC Brass Cabinet PullUnlacquered Brass
Alno
Alno A1298 128mm 5'' CC Brass Cabinet PullUnlacquered Brass
$17.06
$18.95 -
 Alno
Fiore 1 1/2'' Knob A1472Unlacquered Brass
Alno
Fiore 1 1/2'' Knob A1472Unlacquered Brass
$22.46
$24.95


Why this matters
Unlacquered brass is intentionally uncoated — that is the whole point. It reacts with its environment, developing a living patina over months and years. That oxidation is not damage; it is the finish doing what it is designed to do. But dirt, grease from hand contact, and hard-water deposits are different from natural patina. They look dull rather than warm, and they accelerate uneven tarnishing. Cleaning correctly preserves the patina you want while removing the buildup you do not.
Knobs.co has shipped unlacquered brass hardware to homeowners and trade professionals for over two decades. The questions about cleaning come up constantly, and the answers are short: gentle acids, soft cloths, and patience.
What you'll need
Gather these before you remove a single knob or pull:
- Mild dish soap (Dawn or equivalent — fragrance-free is best)
- Warm water
- 2–3 soft microfiber cloths or lint-free cotton rags
- White distilled vinegar or fresh lemon juice
- Table salt
- All-purpose flour (for a paste, optional but effective on heavy tarnish)
- Soft-bristle toothbrush for recessed areas
- Renaissance Wax or a quality paste wax (optional but recommended)
- Phillips-head screwdriver for removal
- Small bowl or cup for mixing
Budget 15–30 minutes for a full kitchen's worth of knobs and pulls if tarnish is light. Heavy tarnish requiring paste treatment adds another 20–30 minutes.
The steps
Step 1: Remove the hardware
Take knobs and pulls off the cabinet doors and drawer fronts before cleaning. Cleaning in place lets moisture wick into the wood and loosens the screw threads over time. Use a Phillips-head screwdriver — or in some cases a flathead — and set hardware in a single layer on a towel. Do not stack pieces; contact marks show on raw brass.
If you are working on unlacquered brass pulls you just installed in 2026, this is also a good moment to check that all screws are fully seated.
Common mistake: Cleaning hardware while it is still mounted. Soap and water pool around the screw post and inside the hole, causing wood swelling and rust on the screw shank.
Step 2: Wipe off surface grease with soapy water
Fill a small bowl with warm water and a few drops of dish soap. Dampen — do not soak — a microfiber cloth, and wipe each piece thoroughly. Focus on the grip area where skin oils concentrate. For knobs with decorative texture or recessed detailing, work a soft toothbrush lightly into the crevices.
Rinse with a clean damp cloth. Dry immediately and completely with a second cloth.
What it accomplishes: This removes the top layer of grease and loose dirt before any acidic treatment. Skipping this step means your acid cleaner is fighting through grease instead of acting on tarnish.
Expected outcome: The hardware looks cleaner but may still show tarnish — a dull brownish or greenish film. That is normal; tarnish requires a second step.
Step 3: Treat tarnish with acid
For light tarnish, cut a lemon in half, sprinkle a pinch of table salt on the cut surface, and rub it directly on the brass. The citric acid and abrasive salt dissolve oxidation in about 60–90 seconds per piece. Wipe clean with a damp cloth, then dry.
For moderate to heavy tarnish, mix equal parts flour, salt, and white distilled vinegar into a paste — roughly 1 tablespoon of each. Apply the paste to the entire surface with a cloth and let it sit for 10 minutes. The mild acetic acid in the vinegar breaks down copper oxide (the primary component of brass tarnish), while the flour keeps the mixture in contact with the surface. After 10 minutes, rub gently in a circular motion, rinse thoroughly with warm water, and dry.
Common mistake: Leaving any acidic residue on the brass. Rinse completely — acid that stays on the surface accelerates re-tarnishing within days.
Expected outcome: The warm golden tone of the raw brass returns. The depth of color will vary by alloy and age; older pieces develop a richer, darker hue in recesses even after cleaning.
Step 4: Dry thoroughly — every surface
Use a dry microfiber cloth and wipe every surface, including the back face, screw post, and any textured areas. Water left on unlacquered brass causes water spots that look like new tarnish within 24–48 hours. If the hardware has deep crevices, set it on a dry towel for 5 minutes after wiping to let residual moisture evaporate.
Do not use a hair dryer or heat source. Heat accelerates oxidation and can cause color blotching on raw brass.
Step 5: Apply wax (optional but strongly recommended)
Once the hardware is dry, apply a thin, even coat of Renaissance Wax or any quality paste wax using a soft cloth. Buff it lightly after 2–3 minutes. The wax layer does not stop patina development entirely, but it slows down fingerprint transfer and moisture contact — the two fastest contributors to uneven tarnish in a kitchen environment.
This step is optional. Some owners want maximum, unimpeded patina development and skip wax entirely. That is a legitimate choice; just expect more frequent cleaning cycles.
Common mistake: Applying too much wax and leaving a hazy film. A very thin coat — less than you think you need — is correct.
Step 6: Reinstall and note the date
Reinstall each piece with hand-tightened screws, then snug them with a screwdriver. Do not overtighten on wood faces; the threads strip easily. Write today's date somewhere you will find it. In a high-use kitchen, unlacquered brass benefits from a soap-and-water wipe-down monthly and a full tarnish treatment 2–3 times per year. In 2026, a simple calendar reminder is the most underused maintenance tool in hardware care.
Troubleshooting
Tarnish returns within days after cleaning. You left acid residue on the surface, or the hardware is in a high-humidity area. Re-clean with soapy water only, dry completely, and apply wax. If it is a bathroom installation, expect a faster tarnish cycle regardless.
Green or blue-green spots appear. This is verdigris — copper oxide reacting with moisture or acidic air. It is not structural damage. The salt-and-flour paste will remove it. Persistent verdigris in the same spot usually indicates a moisture source nearby (a slow-drip faucet, condensation from a pipe).
Brass looks blotchy after cleaning — some areas darker than others. The paste was applied unevenly or rinsed unevenly. Re-apply the paste to the lighter sections only, match the 10-minute dwell time, and blend outward. Perfectly uniform color across a full set of knobs takes 1–2 cleaning cycles to achieve.
Finish looks cloudy despite cleaning. Someone applied a commercial lacquer-brass polish to what is actually unlacquered hardware. Those polishes contain coatings designed to sit on top of lacquer, not raw metal. Use straight white vinegar on a cloth and wipe thoroughly to cut through any polish residue.
Screws are stuck after removal. This happens when moisture from previous cleaning episodes has corroded the screw or oxidized the wood threads. Apply a small amount of penetrating oil to the screw head, wait 5 minutes, and use a properly sized screwdriver with firm downward pressure. Do not strip the head.
Hardware cleaned correctly but developing uneven natural patina over months. This is expected behavior for unlacquered brass — it is not a cleaning failure. High-touch areas darken faster than sides or backs. If you want a more uniform patina, wear cotton gloves when handling the hardware for a few weeks to even out the rate of change.
Tools and resources
- Soft microfiber cloths — 2 minimum, 3 preferred
- White distilled vinegar (5% acidity, standard grocery-store variety)
- Table salt and all-purpose flour for the paste method
- Renaissance Wax or Briwax paste wax
- Soft-bristle toothbrush
- Phillips-head screwdriver
If you are sourcing new unlacquered brass hardware for a 2026 kitchen or bath project, Knobs.co stocks a full range of unlacquered brass cabinet knobs and unlacquered brass cabinet pulls across dozens of profiles and sizes. Free samples are available so you can test the finish against your cabinet color before committing.
What to do next
If you are working through a broader cabinet hardware project, the guide on how to choose the right cabinet knob size is a useful next read — sizing errors are the second most common reason unlacquered brass hardware gets returned, right behind cleaning damage.
FAQ
What is the best way to clean unlacquered brass cabinet hardware without damaging it? Mild dish soap and warm water handles routine cleaning. For tarnish, a paste of equal parts flour, salt, and white vinegar — left on for 10 minutes, then rinsed completely — removes oxidation without scratching the metal.
How often should I clean unlacquered brass cabinet hardware? In a kitchen, a soap-and-water wipe-down once a month keeps grease from building up. A full tarnish treatment with the vinegar paste is needed 2–3 times per year depending on your climate and how heavily the hardware is used.
Can I use Brasso or commercial brass polish on unlacquered brass cabinet hardware? No. Most commercial brass polishes are formulated for lacquered brass and leave a coating residue that interferes with natural patina development on unlacquered pieces. Use the flour-salt-vinegar paste or lemon-and-salt instead.
Does unlacquered brass tarnish faster in a bathroom than a kitchen? Yes. Bathroom humidity accelerates oxidation noticeably. Expect to clean bathroom unlacquered brass hardware 3–4 times per year versus 2–3 times in a kitchen. Applying wax after each cleaning is especially important in high-humidity spaces.
Will cleaning remove the patina I want on my unlacquered brass hardware? The acid treatment will brighten the brass and remove surface tarnish, including some of the darker patina in raised areas. If you want to preserve a specific aged look, use only the soap-and-water step to remove grease and skip the acid treatment.
Is unlacquered brass harder to maintain than oil-rubbed bronze or satin nickel? Yes, unlacquered brass requires more intentional care than coated finishes. The trade-off is a living finish that develops genuine character over years. Coated finishes like satin nickel are more set-and-forget; unlacquered brass rewards owners who engage with it.
Can I use a baking soda paste instead of flour, salt, and vinegar? Baking soda is mildly alkaline rather than acidic, which makes it less effective on brass tarnish. It will provide some mild abrasion but will not dissolve copper oxide as efficiently. The flour-salt-vinegar paste is the more reliable method.
What happens if I accidentally use a bleach cleaner on unlacquered brass? Bleach causes rapid, uneven oxidation and can permanently discolor raw brass. If it happens, rinse immediately with water, neutralize with a small amount of dish soap, and re-rinse thoroughly. Some discoloration may remain and require a vinegar paste treatment to partially correct.
One last thing
Unlacquered brass hardware is one of the few cabinet hardware finishes that actually looks better used than new. In 2026, after two or three years of regular use and proper cleaning cycles, a set of unlacquered brass knobs on white shaker cabinets will have developed a depth of color that no factory finish can replicate. The cleaning work is minimal — the payoff is the only cabinet hardware finish that tells a visible story about the kitchen it lives in.
Related guides
- Best unlacquered brass pulls for shaker cabinets
- Unlacquered brass cabinet knobs for kitchen cabinets
- Unlacquered brass appliance pulls for panel-ready fridges
Shop Unlacquered Brass Cabinet Hardware
-
 Contemporary I Bath Towel Bar A8320
$98.96
Contemporary I Bath Towel Bar A8320
$98.96
-
 Alno A1032 1'' Brass Cabinet Knob
$13.46
Alno A1032 1'' Brass Cabinet Knob
$13.46
-
 Haniburton Back to Back, Appliance Pull, 15'' cc
$875.09
Haniburton Back to Back, Appliance Pull, 15'' cc
$875.09
-
 Contemporary I Bath Tissue Holder A8360
$98.96
Contemporary I Bath Tissue Holder A8360
$98.96
-
 Haniburton Back to Back, Appliance Pull, 12'' cc
$697.11
Haniburton Back to Back, Appliance Pull, 12'' cc
$697.11
-
 Haniburton Back to Back, Appliance Pull, 18'' cc
$1,056.78
Haniburton Back to Back, Appliance Pull, 18'' cc
$1,056.78
-
 Alno A1145 1 1/4'' Brass Cabinet Knob
$16.16
Alno A1145 1 1/4'' Brass Cabinet Knob
$16.16
-
 Haniburton Concealed Surface, Appliance Pull, 15'' cc
$437.55
Haniburton Concealed Surface, Appliance Pull, 15'' cc
$437.55


Browse all 637 in Unlacquered Brass Cabinet Hardware → Cabinet knobs Cabinet pulls & handles