

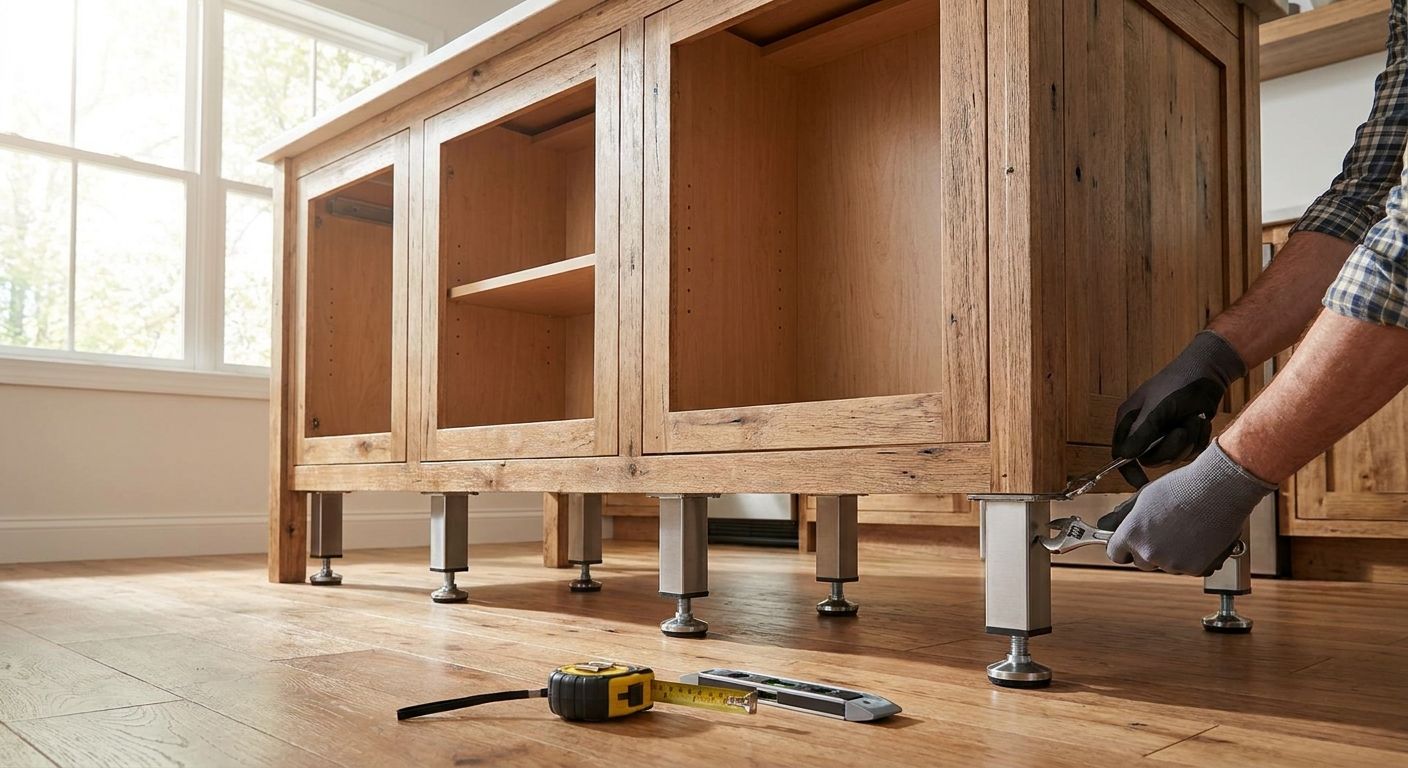
Cabinet legs and levelers for kitchen islands solve one problem: getting a heavy, freestanding cabinet run to sit flat on a floor that is almost never actually flat. An island carries its own weight without a neighboring cabinet run to hold it upright, so any dip, crown, or twist in the subfloor shows up fast — as a rocking base, a gapped toe kick, or a countertop seam that won't sit true. This guide walks through how DIY renovators and remodelers diagnose an out-of-level island, choose the right leveling hardware, and finish the job once the base is square.
Shop the finish
Every antique brass knob and pull we carry, in one place — filter by size, style, and brand.
Browse Antique Brass Cabinet Hardware →- Cabinet legs for kitchen islands need adjustable levelers, not fixed feet, to correct an uneven subfloor.
- Diagonal measurement catches twist that a single bubble level misses on wide island bases.
- Overtightening levelers is the top mistake in 2026 remodels — it stresses the toe-kick panel and cracks the paint line.
- Knobs.co doesn't stock cabinet legs, but its bar pulls and knobs finish the island once the base sits flat.
Why cabinet legs and levelers matter for kitchen islands
A perimeter cabinet has two or three points of contact with the boxes next to it holding it upright. An island has none of that. Every leg or leveler under an island base is doing real structural work, not cosmetic adjustment — it's the only thing keeping the box square.
Get the leveling wrong and the symptoms show up in places that have nothing to do with the legs themselves: a dishwasher door that won't seal, a drawer that self-opens on one side, a mitered countertop seam that opens a hairline gap a few months later. Renovators searching for cabinet legs and levelers for kitchen islands in 2026 are usually troubleshooting one of those symptoms, not shopping in the abstract.
If you're mid-renovation, the leveling step happens before you ever think about cabinet pulls for kitchen islands, but the two decisions are connected — hardware placement depends on a square, level box, and crooked hardware on a tilted island is one of the most common finish complaints after a remodel.
Islands also take more abuse than perimeter runs. Kids push off the toe kick, bar stools scrape the base, and the whole assembly absorbs lateral bumps a wall cabinet never sees. The leveling hardware has to hold its adjustment under that repeated small shock, not just settle once and stay put.
Step 1: Measure how far off-level the island actually is
Don't buy leveling hardware until you know how much correction you need and in which direction.
- Set a 4-foot level along the front toe kick, then the side, then both diagonals across the top of the base
- Mark the low corner with tape — that's the datum point every other adjustment works from
- Check against the finished floor, not the subfloor, if flooring goes in after the island is set
- Note whether the gap is a straight tilt in one plane or a twist, where diagonal corners lift unevenly — twist needs independent adjustment at each leg, not a single shim under one edge
- Re-measure after any framing or subfloor work, since a fix in one spot can change the reading elsewhere on a large island
Step 2: Pick the leveling method for your island's base
- Fixed toe-kick legs work only when the floor is already close to flat and won't move
- Threaded bullet levelers thread into a T-nut set in the base and adjust from inside the cabinet or through an access hole
- Shim stacks under a solid toe kick are the cheapest fix but the least durable option over time
- Adjustable corner blocks spread weight across four points instead of two, which suits islands wider than 6 feet
- Decorative furniture-style legs need a separate internal leveler hidden inside the leg itself, since most decorative legs have no built-in adjustment on their own
Step 3: Install adjustable levelers or corner blocks
- Drill for the leveler's mounting plate before setting the cabinet in its final position, not after
- Thread each leveler to roughly the same starting height so you're fine-tuning small differences, not making large corrections one leg at a time
- Work from the highest corner down — set the tallest point first, then bring the other three up to match it
- Leave at least a half turn of adjustment range in reserve on every leveler, since floors keep settling after the install
- Check that the leveler's base plate sits flat on the floor material — carpet pad and vinyl plank both compress differently under load
Step 4: Level the island across both axes
- Check level front-to-back and side-to-side independently — a base can pass one check and still fail the other
- Re-check the diagonal after every adjustment, since correcting one corner shifts the reading at the opposite corner
- Use a longer level or a straightedge with a level taped to it on islands wider than 6 feet — a short torpedo level misses twist across a long base
- Confirm the countertop substrate, whether plywood or backer board, sits flat on the leveled base before stone or quartz goes on top
- Test with any built-in appliance in place — a dishwasher or beverage-fridge door seal is the most sensitive indicator of leftover tilt
Step 5: Lock the base and secure the reveal
- Snug each leveler's locknut once the position is confirmed — a leveler still free-threading will walk under vibration from foot traffic
- Fasten the base to the floor only after final leveling, using anchors suited to the subfloor type
- Cap exposed threaded levelers with the manufacturer's plastic foot before flooring or toe-kick trim goes on
- Re-check level one more time after fastening — clamping down a base can shift the reading you set a few minutes earlier
Step 6: Match the hardware once the island sits flat
This is where the leveling job and the hardware decision meet. A level island reads correctly with pulls and knobs installed in a straight, consistent line — a tilted one makes even perfectly measured hardware look crooked.
- Knobs.co doesn't stock cabinet legs or levelers — that part of the job comes from a cabinet shop, home center, or millwork supplier
- Once the base is square, pick the right pull size for a kitchen island before drilling any holes
- Long, wide island drawers usually take a longer pull than perimeter cabinets do — see 12-inch bar pulls for kitchen island cabinets for sizing that suits a wide face frame
- Order samples in the finish you're considering before committing to a full island's worth of hardware — a finish that reads warm on a small swatch can look different across a long, well-lit run
Leveling options for kitchen islands compared
| Option | Best for | Key limitation |
|---|---|---|
| Threaded bullet levelers | Islands on hardwood or tile with moderate unevenness | Needs an access hole or interior reach to adjust |
| Adjustable corner blocks | Wide islands (6 ft+) needing four-point support | Bulkier than a single leveler, takes up toe-kick depth |
| Shim stacks | Quick, low-cost fixes on a nearly-flat floor | Compresses and shifts over time, needs rechecking |
| Furniture-style legs with hidden levelers | Islands designed to show exposed legs | Adjustment range is limited by the leg's internal mechanism |
| Fixed toe-kick legs | New construction on a certified flat subfloor | No correction available once installed |
Verdict: for most 2026 kitchen remodels, threaded bullet levelers or adjustable corner blocks beat fixed legs and shims on durability — buy adjustable, skip fixed, unless the subfloor is already confirmed flat.
Common mistakes kitchen island owners make
- Leveling only front-to-back and skipping the diagonal check — a base can look level from one side and still be twisted corner to corner
- Overtightening levelers — cranking past snug stresses the base panel and shows up later as a hairline crack along a painted toe kick
- Fastening the base before the countertop template is confirmed — stone templators sometimes need a specific reveal height, and refastening after the fact is harder than doing it once
- Choosing decorative legs with no adjustment range for a floor that turns out to need more correction than expected
- Skipping the appliance door check — a dishwasher or beverage-fridge door seal shows residual tilt long before a bubble level does


FAQ
What's the best way to level a kitchen island?
Set a 4-foot level along both axes and both diagonals first, then correct with threaded bullet levelers or adjustable corner blocks rather than shims. Levelers hold their adjustment under repeated foot traffic and bar-stool bumps better than a stack of shims does.
Are cabinet legs or levelers better for a kitchen island?
Threaded levelers beat fixed legs on any freestanding island base, because a fixed leg has no way to correct for an uneven floor once it's installed. Decorative legs work only when paired with a hidden internal leveler.
How much can a cabinet leveler adjust?
Adjustment range varies by leveler design, so check the specific product's travel range before assuming it covers your floor's variation. Islands wider than 6 feet with a noticeable twist often need corner blocks instead of a single-point leveler.
Do all kitchen islands need levelers?
Any freestanding island base benefits from adjustable levelers, because it has no neighboring cabinets to hold it upright the way a perimeter run does. New construction on a certified flat subfloor is the rare exception where fixed legs hold up fine.
Can I use shims instead of levelers on a kitchen island?
Shims work as a quick fix on a nearly flat floor, but they compress and shift over time and need rechecking more often than a threaded leveler does. For an island that gets daily traffic, a leveler is the more durable choice.
Does Knobs.co sell cabinet legs for kitchen islands?
No — Knobs.co carries cabinet hardware, including knobs, pulls, hinges, and drawer slides, not structural legs or levelers. Cabinet legs and levelers come from a cabinet shop, home center, or millwork supplier; hardware for the finished island is where Knobs.co fits in.
How do I know if my kitchen island is unlevel?
Run a 4-foot level along the front, the side, and both diagonals across the top of the base — a gap under the level at any of those four checks means correction is needed. A dishwasher door that won't seal or a countertop seam that opens over time are common symptoms of an island that was never fully leveled.
What hardware finish goes with an island once it's level?
Finish choice depends on the rest of the kitchen's hardware, but a level island reads cleanest with pulls installed in a single consistent line, since any tilt makes even correctly measured hardware look crooked. Order samples before committing to a full island's worth of pulls in one finish.
One last thing
The corner that needs the most correction is almost never the one closest to a wall. Floor joists deflect most at midspan, away from bearing walls, so an island centered in a room typically needs more leveler travel on the side sitting over the open span than the side sitting over the perimeter. Check that corner first in 2026 remodels before assuming the whole base needs the same adjustment.


