

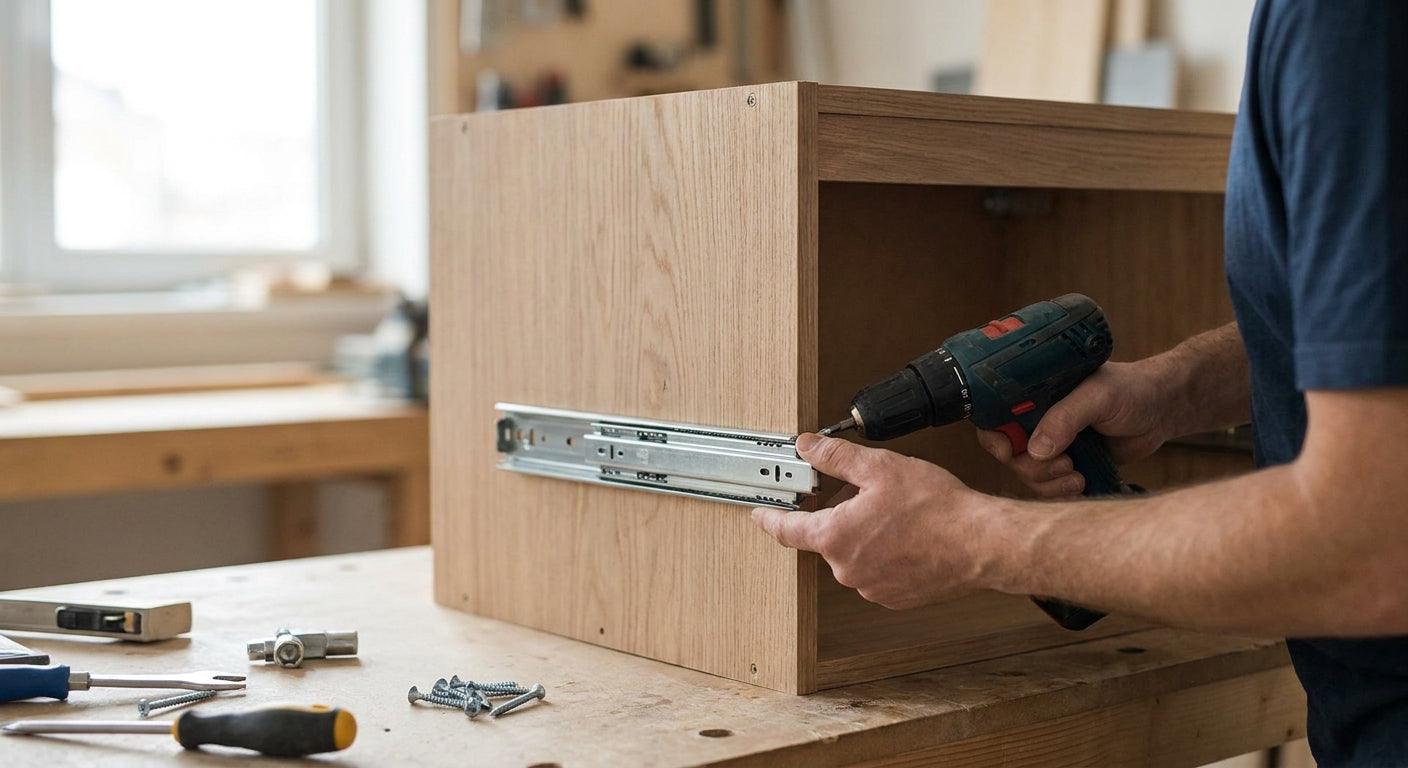
Drawer slides look simple until the drawer won't close flush, binds halfway, or drops out of square the first time someone loads it with pots. Get the mounting sequence right and a slide install takes about 20-30 minutes per drawer with basic tools.
Shop drawer slides
Every drawer slide we carry, in one place — filter by length, load rating, and brand.
Browse Drawer Slides →- Side-mount ball-bearing slides need 1/2 inch of clearance on each side of the drawer box, no more, no less.
- Mount the cabinet member level and square first — off by 1/16 inch causes binding on close.
- Undermount soft-close slides need a mounting notch cut into the drawer bottom before install, not after.
- Slides rated 75 lbs handle standard kitchen drawers; go 100 lbs or higher for pot-and-pan drawers.
- For most first-time installs in 2026, full-extension side-mount slides are the forgiving choice over undermount.
Shop the picks from this guide
In stock at Knobs.co · Free shipping on hardware orders $99+ · 110% price match
-
 Hickory Hardware
Drawer Slides Drawer Slide Center Mount Mono Rail 3/4 Extension Adjustable Length Cadmium Finish P1175-2C
Hickory Hardware
Drawer Slides Drawer Slide Center Mount Mono Rail 3/4 Extension Adjustable Length Cadmium Finish P1175-2C
$16.00
$19.99 -
 Hickory Hardware
Drawer Slides Drawer Slide Bottom Mount 3/4 Extension 22'' White Finish P1700/22-W
Hickory Hardware
Drawer Slides Drawer Slide Bottom Mount 3/4 Extension 22'' White Finish P1700/22-W
$23.20
$28.99 -
 Hickory Hardware
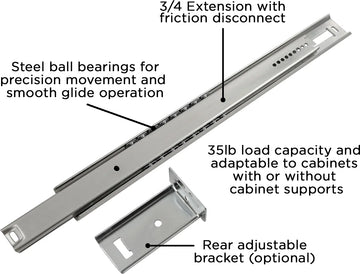
Drawer Slide Center Mount 3/4 Extension 14'' Cadmium Finish P1029/14-2C
Hickory Hardware
Drawer Slide Center Mount 3/4 Extension 14'' Cadmium Finish P1029/14-2C
$18.40
$22.99 -
 Hickory Hardware
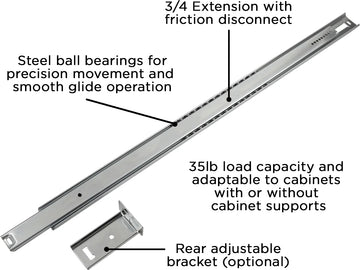
Drawer Slide Center Mount 3/4 Extension 22'' Cadmium Finish P1029/22-2C
Hickory Hardware
Drawer Slide Center Mount 3/4 Extension 22'' Cadmium Finish P1029/22-2C
$22.40
$27.99 -
 Hickory Hardware
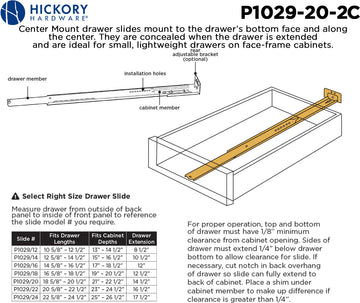
Drawer Slide Center Mount 3/4 Extension 20'' Cadmium Finish P1029/20-2C
Hickory Hardware
Drawer Slide Center Mount 3/4 Extension 20'' Cadmium Finish P1029/20-2C
$22.40
$27.99 -
 Hickory Hardware
Drawer Slide Center Mount 3/4 Extension 18'' Cadmium Finish P1029/18-2C
Hickory Hardware
Drawer Slide Center Mount 3/4 Extension 18'' Cadmium Finish P1029/18-2C
$20.80
$25.99


Why this matters
A drawer that binds or sags isn't a cosmetic problem — it's a measurement problem, and it usually traces back to one of three mistakes: wrong clearance, an out-of-level cabinet member, or the wrong slide length for the box. Fix the sequence once and every drawer in the run behaves the same way.
Cabinet hardware gets judged on how it feels every single day, not how it looks in a photo. A pull can be perfect and the drawer still frustrates you if the drawer slides for kitchen cabinets underneath weren't matched to the box or mounted square. That's the part most DIY guides skip past — the hardware choice happens before the drill comes out.
What you'll need
- Tape measure and a pencil
- Drill/driver with an 1/8-inch pilot bit
- 4-foot level (or a smaller torpedo level for tight cabinets)
- Slide set matched to your drawer box length and weight — measure the cabinet opening depth, not the drawer box, and buy the closest shorter size
- Screws in the right screw length for your cabinet material — particleboard and solid wood take different lengths
- A scrap wood spacer, roughly 1/2 inch thick, or a slide-mounting jig
- Phillips or square-drive screwdriver bit
Skip the jig only if you're comfortable eyeballing level across a 20-inch span. Most people aren't, and a $15 jig pays for itself on the second drawer.
The steps
1. Measure the cabinet opening and the drawer box
Measure the depth of the cabinet opening from the front face frame to the back panel, and separately measure the drawer box depth. Buy slides that match the shorter of the two measurements — a slide that's too long will hit the back panel before the drawer closes. In 2026, most stock kitchen cabinets run 18 to 22 inches deep, which puts you in the 18-inch to 21-inch slide range for full-extension hardware.
Common mistake: measuring the drawer front instead of the drawer box. The front is almost always wider and deeper than the box behind it, and that mismatch is the single most common return reason on drawer slide orders.
2. Choose the right slide type and length
Side-mount ball-bearing slides bolt to the side of the drawer box and the inside of the cabinet — visible, forgiving, and the easiest type to install without special tools. Undermount slides hide beneath the drawer for a cleaner look but require a notch cut into the drawer bottom and tighter tolerances.
For a first install, side-mount full-extension slides at 75 lbs capacity cover the vast majority of kitchen and vanity drawers. Reserve 100 lb-rated slides for drawers stacking cast iron or a mixer.
3. Mark and mount the cabinet member
Set your 1/2-inch spacer flat on the cabinet bottom, rest the cabinet-side slide rail on top of it, and mark the front screw hole. This spacer is what creates the clearance gap on both sides — skip it and the drawer binds against the cabinet walls.
Drive one screw at the front hole, check the rail with a level front-to-back, then drive the remaining screws. Do this before touching the drawer member — an out-of-level cabinet rail guarantees a crooked drawer no matter how well you mount the other half.
Common mistake: driving all the screws before checking level. Once four screws are in, correcting a 1/16-inch tilt means pulling the rail and re-drilling.
4. Mount the drawer member
Align the drawer-side slide member flush with the top edge of the drawer box side panel and flush with the front edge. Mark and pre-drill the front hole, drive one screw, check the rail sits parallel to the bottom of the box, then finish the remaining screws.
Repeat steps 3 and 4 on the opposite side using the same spacer height. Consistency between the two sides matters more than getting either side perfect — a 1/8-inch mismatch side-to-side causes a drawer to rack when it opens.
5. Test-fit before final tightening
Slide the drawer member into the cabinet member and push the drawer in by hand. It should glide with light resistance and stop cleanly at full extension without wobble. If it binds, don't force it — pull it back out and check that both cabinet rails are at the same height.
Expected outcome: the drawer opens and closes with one hand, no lifting or shoving required, and sits flush with the face frame or the adjacent drawer front.
6. Square the drawer front and lock down screws
Once the drawer glides cleanly, attach the drawer front if it's a separate piece, using clamps to hold it square against the box while you drive the mounting screws from inside. Check the reveal gap on all four sides matches — inconsistent gaps mean the box shifted during mounting.
7. Cycle the drawer fully, then load-test
Open and close the drawer 10 to 15 times to seat the ball bearings and confirm the soft-close mechanism (if equipped) engages the last two inches smoothly. Then load it with the weight it'll actually carry — flatware, pots, whatever the drawer's job is — and run it a few more cycles. A slide that feels fine empty can sag once you hit its rated capacity.
Troubleshooting
- Drawer doesn't sit flush with the face frame — one cabinet rail is mounted deeper than the other. Pull both screws at the front hole and re-align using the same reference point on each side.
- Drawer sticks halfway open — the two rails aren't parallel. Check with a level across both rails at the same point front-to-back.
- One side rides higher than the other — the spacer wasn't consistent between sides. Re-measure and shim the low side.
- Drawer front tilts down when fully open — usually undersized screws or a stripped pilot hole letting the rail flex under load. Move to a slightly larger screw or fill and re-drill the hole.
- Soft-close doesn't engage — the drawer isn't reaching full travel before the mechanism can grab, often because the slide is too long for the opening. Swap for a shorter slide length rather than forcing the fit.
- Drawer rattles side to side — clearance is too generous. Re-check that you used a consistent 1/2-inch spacer and not a thicker scrap piece.
If a cabinet is out of square to begin with — common in older homes settling over decades — no slide adjustment fixes that on its own. That's a cabinet repair problem, not a hardware problem, and worth diagnosing separately before you order more slides.
Tools and resources
- Slide sets sized to your cabinet depth — cross-check options against the drawer slides guide before ordering
- Correct screw length for your cabinet material
- A slide-mounting jig if you're doing more than two or three drawers in one project
- Knobs.co stocks slide-compatible cabinet hardware if you're pairing new pulls with the same remodel
What to do next
Once the slides run clean, the pulls and knobs go on next — that's a separate hole-spacing and screw-length job, and doing it after the slides are locked in means you're not fighting drawer alignment and hardware placement at the same time.
FAQ
How do you install drawer slides on a cabinet?
Mount the cabinet-side rail level using a 1/2-inch spacer for clearance, then mount the matching drawer-side rail flush with the drawer box edges, and test-fit before driving final screws. Getting the cabinet rail level first prevents the binding that causes most failed installs.
What size drawer slides do I need?
Measure the cabinet opening depth, not the drawer box or drawer front, and buy the slide length closest to but not longer than that measurement. Most stock kitchen cabinets in 2026 take 18 to 21-inch full-extension slides.
Are undermount or side-mount drawer slides better?
Side-mount ball-bearing slides are easier to install and more forgiving of minor measurement error, making them the better choice for a first install. Undermount slides hide from view but require a notch cut into the drawer bottom and tighter tolerances.
How much weight can drawer slides hold?
Standard kitchen drawer slides are rated for 75 to 100 lbs, with heavier-duty options available for pot-and-pan drawers or file drawers. Check the rating printed on the slide packaging before loading a drawer with anything unusually heavy.
Why does my drawer stick after installing new slides?
Sticking almost always means the two cabinet-side rails aren't level with each other or aren't parallel front-to-back. Recheck both rails with a level at matching points before assuming the slide itself is defective.
Do I need special tools to install drawer slides?
A drill/driver, an 1/8-inch pilot bit, a level, and a spacer or jig cover most side-mount installs without any specialty tools. Undermount slides sometimes require a router or pre-notched drawer boxes.
How much clearance do drawer slides need?
Side-mount ball-bearing slides need about 1/2 inch of clearance on each side of the drawer box, for roughly 1 inch total width added to the drawer opening. Undermount slides need less side clearance but more vertical clearance underneath the drawer.
Can I reuse the old screw holes when replacing drawer slides?
Only if the new slide's hole spacing matches the old one exactly, which is uncommon across different brands. Plan on new pilot holes and fill the old ones if they don't line up.
One last thing
The spacer trick — resting the slide on a 1/2-inch scrap block while you mark the first hole — is the single step that separates a smooth install from an afternoon of trial and error, and it costs nothing but a piece of scrap wood already in your shop.


