

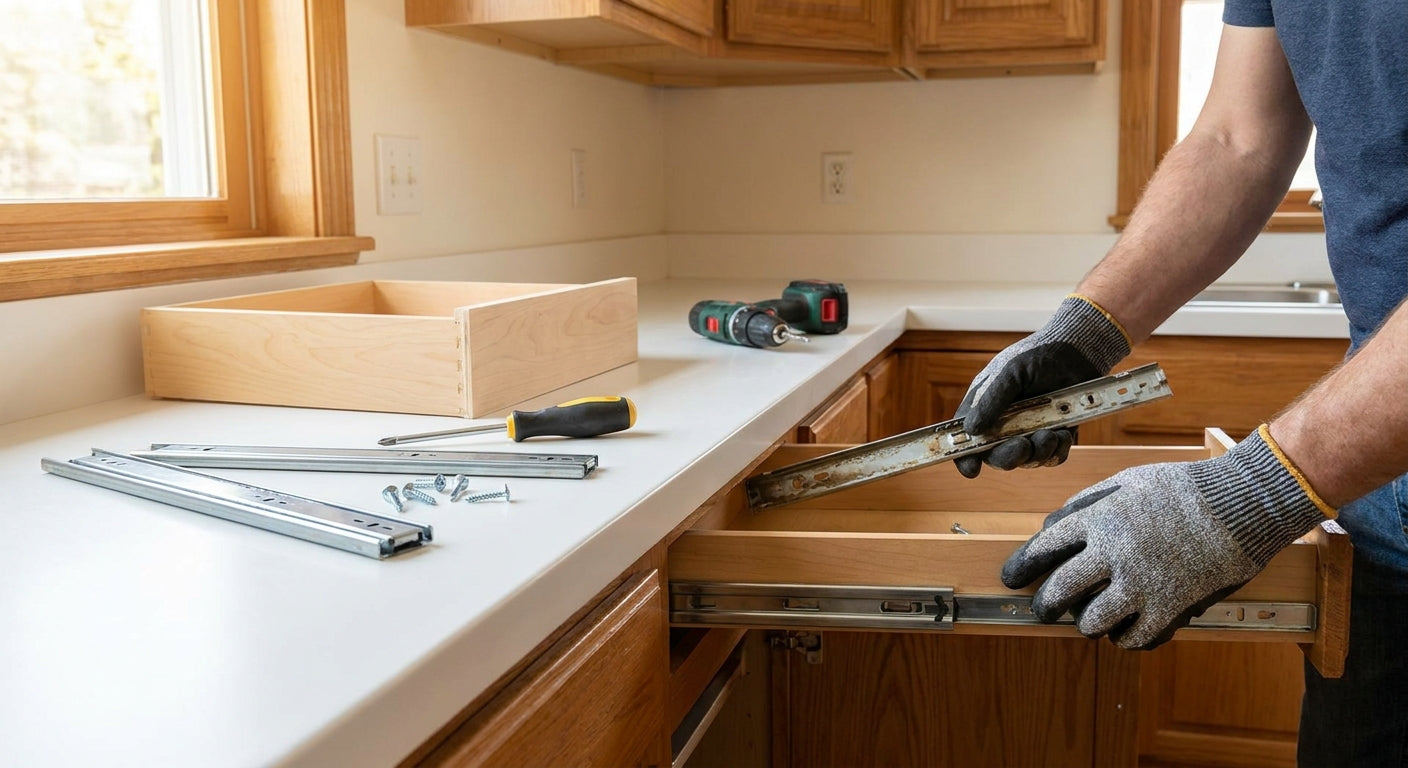
Worn drawer slides make a kitchen feel broken even when the cabinets themselves are fine — replacing them is a 30-60 minute repair per drawer, not a remodel.
Shop drawer slides
Every drawer slide we carry, in one place — filter by length, load rating, and brand.
Browse Drawer Slides →- Learning how to replace drawer slides takes 30-60 minutes per drawer with a drill, screwdriver, and a tape measure.
- Match old slide length exactly — a 3/4 extension side-mount slide swapped for a full-extension model needs new mounting holes.
- Side-mount slides handle roughly 75-100 lbs; undermount soft-close slides run $30-60 per pair in 2026 and add slower closing action.
- Strip screws and racked drawer boxes are the two failures that turn a 10-minute job into an hour — check both before you order parts.
Shop the picks from this guide
In stock at Knobs.co · Free shipping on hardware orders $99+ · 110% price match
-
 Hickory Hardware
Drawer Slides Drawer Slide Center Mount Mono Rail 3/4 Extension Adjustable Length Cadmium Finish P1175-2C
Hickory Hardware
Drawer Slides Drawer Slide Center Mount Mono Rail 3/4 Extension Adjustable Length Cadmium Finish P1175-2C
$16.00
$19.99 -
 Hickory Hardware
Drawer Slides Drawer Slide Bottom Mount 3/4 Extension 22'' White Finish P1700/22-W
Hickory Hardware
Drawer Slides Drawer Slide Bottom Mount 3/4 Extension 22'' White Finish P1700/22-W
$23.20
$28.99 -
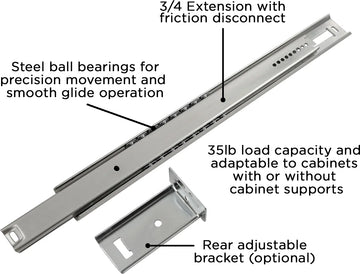 Hickory Hardware
Drawer Slide Center Mount 3/4 Extension 14'' Cadmium Finish P1029/14-2C
Hickory Hardware
Drawer Slide Center Mount 3/4 Extension 14'' Cadmium Finish P1029/14-2C
$18.40
$22.99 -
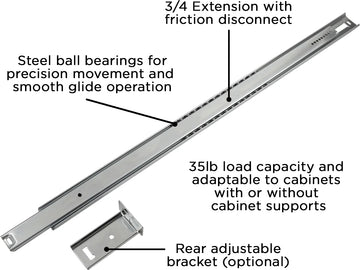 Hickory Hardware
Drawer Slide Center Mount 3/4 Extension 22'' Cadmium Finish P1029/22-2C
Hickory Hardware
Drawer Slide Center Mount 3/4 Extension 22'' Cadmium Finish P1029/22-2C
$22.40
$27.99 -
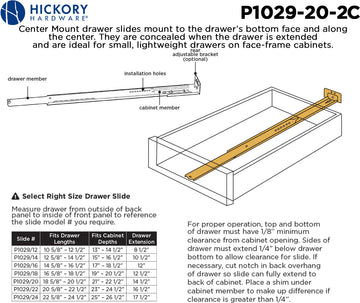 Hickory Hardware
Drawer Slide Center Mount 3/4 Extension 20'' Cadmium Finish P1029/20-2C
Hickory Hardware
Drawer Slide Center Mount 3/4 Extension 20'' Cadmium Finish P1029/20-2C
$22.40
$27.99 -
 Hickory Hardware
Drawer Slide Center Mount 3/4 Extension 18'' Cadmium Finish P1029/18-2C
Hickory Hardware
Drawer Slide Center Mount 3/4 Extension 18'' Cadmium Finish P1029/18-2C
$20.80
$25.99


Why this matters
A drawer that drags, tilts, or falls off its track isn't a sign the cabinet is failing — it's almost always the slide hardware wearing out. Ball-bearing slides have a functional lifespan, and once the bearings pit or the nylon rollers flatten, no amount of lubrication fixes it.
Replacing the slide instead of the whole drawer box saves money and keeps you from redoing paint or stain matching. Most kitchen drawers built after 1990 use one of three slide types — side-mount, center-mount, or undermount — and each swaps out differently. Get the type wrong at the store and you'll be back for a return trip, so identifying what's currently installed is step one, not an afterthought.
Homeowners tackling this in 2026 are also using it as an upgrade moment: swapping old friction slides for soft-close best drawer slides for kitchen cabinet drawers is a common pairing with this repair, since the labor is identical either way.
“If the drawer wobbles side to side before you touch it, the slide is worn, not the cabinet.”
What you'll need
- Replacement slides matched to your drawer's current length (measure cabinet opening depth, not the drawer box)
- Phillips and flathead screwdrivers, or a drill with a Phillips bit
- Tape measure and a pencil
- 1/8" drill bit for new pilot holes
- Wood filler if old screw holes don't align with new hardware
- A helper or a prop block to hold the drawer level while you work
- Optional: a cabinet hardware jig if you're relocating mounting points
If you're replacing more than two or three drawers, order slides in bulk from the same production run — slight sizing variance between batches can throw off a full-extension mechanism by a few millimeters.
The steps
1. Empty the drawer and pull it fully open
Remove everything from the drawer box so you're not fighting weight while you work. Pull the drawer to its fullest extension and look for a release tab or lever on each slide — most slides from the 2000s onward disengage with a simple push-down tab, no tools required.
If there's no visible tab, the drawer is likely screwed directly to the slide from inside the box. Common mistake: yanking hard on a drawer that's still screwed in place, which bends the slide track and makes the old one harder to remove cleanly for comparison.
2. Detach the drawer box from the slide
With the release engaged, lift the drawer up and out, or unscrew it from inside if it's a fixed mount. Set the drawer box aside on a flat surface.
Check the inside face of the drawer box for two things: screw pattern (how many holes, what spacing) and any splitting around the holes. This tells you whether you can reuse the same holes or need to relocate them — a detail covered in more depth in how to remove old cabinet hardware without damaging cabinets.
3. Remove the old slide from the cabinet frame
Back out every screw holding the cabinet-side track in place, usually 3 to 5 per slide. Keep the old slide — you'll use its length and mounting hole spacing as your template for the new one.
Measure the old slide end to end. Slides come in standard lengths (12", 14", 16", 18", 20", 22") and buying the wrong length by even an inch means the drawer won't seat flush against the face frame.
4. Mark and drill pilot holes for the new slide
Hold the new slide against the cabinet side wall at the same height as the old mounting holes. Mark each screw location with a pencil, then drill 1/8" pilot holes — this keeps the wood from splitting when you drive the screw, especially in softer plywood cabinet boxes common in production kitchens.
If the new slide's hole spacing doesn't match the old one, a cabinet hardware jig keeps both sides level without eyeballing it. Common mistake: skipping pilot holes on drawer-box-side mounting screws, which strips the thin plywood on the first install.
5. Mount the cabinet-side track
Screw the track into the cabinet frame through the pilot holes, working front to back so the slide stays straight. Don't fully tighten the front screw until the whole track is aligned — a slightly loose front screw lets you nudge the track level before locking it down.
Check with a level if the drawer has ever dragged unevenly. A track that's off by even 1/8" over its length causes binding at full extension.
6. Attach the drawer-side member and test fit
Screw the matching drawer-side bracket onto the drawer box using the same hole pattern you identified in step 2. Slide the drawer box onto the cabinet track and push it in until it clicks or locks.
Open and close it three or four times before loading anything back in. It should glide with even resistance the whole length, not just at the start or end.
7. Reload the drawer and check the reveal
Put items back in the drawer and check the gap around the drawer front against the cabinet face — this is called the reveal, and it should be even on all sides, roughly 1/8" to 3/16" depending on your cabinet style.
An uneven reveal after a slide swap almost always means one side's mounting height is off by a few millimeters, not a defective slide. Re-check step 5 before assuming you got a bad part.


Troubleshooting
- Drawer won't fully close — the slide track is bowed or a screw is sticking up past the surface. Re-check every screw head sits flush.
- Drawer drags on one side — one track is mounted lower than the other. Loosen it, re-level with a straightedge, retighten.
- New slide is longer than the old one — some full-extension replacements run 1-2 inches longer than the original 3/4 extension slide. Measure the cabinet's interior depth before buying, not just the old slide length.
- Screw holes stripped from the old install — fill with wood filler or a golf tee dipped in glue, let it cure, then re-drill offset by 1/4".
- Drawer box is racked (not square) — no slide fixes a warped box. Square the corners with a clamp before mounting new hardware, or the slide will bind regardless of quality.
- Soft-close mechanism doesn't engage — the drawer isn't seated fully at the back of the track. Push firmly until you hear the click, don't just let it coast in.
Tools and resources
- Drill with 1/8" bit, Phillips screwdriver, tape measure, pencil
- Replacement slides sized to your cabinet's opening depth — browse options at Knobs.co if your current hardware is discontinued
- Wood filler for stripped or mismatched screw holes
- A cabinet hardware jig for relocating mounting points cleanly
What to do next
Once the slides are handled, worn hinges are usually the next weak point in the same kitchen — most cabinets built in the same era wear hinges and slides at a similar rate. Check how to choose the right cabinet hinge for your cabinets before you put the tools away.
FAQ
How do I know if my drawer slides need replacing?
If a drawer wobbles side to side, drags unevenly, or falls off track when fully extended, the slide bearings or rollers are worn and need replacing, not just cleaning. Lubricant masks the problem for a week or two at most.
How much does it cost to replace drawer slides?
Side-mount slides typically run $10-25 per pair, while soft-close or undermount slides run $30-60 per pair as of 2026. A full kitchen of 10-15 drawers usually lands between $150 and $600 in parts alone.
Can I replace just one drawer slide instead of both?
You can, but slides wear at roughly the same rate on both sides of a drawer, so replacing only one usually means uneven resistance and a drawer that pulls crooked. Replace both sides of a drawer at the same time.
Do I need to match the exact slide brand when replacing?
No, but you need to match the mounting type (side-mount, center-mount, or undermount) and the length within an inch. Brand only matters if the mounting hole spacing is proprietary, which is rare outside a few European hardware lines.
What's the difference between full-extension and 3/4-extension slides?
Full-extension slides let the drawer box pull completely out of the cabinet opening, giving access to the back corners. 3/4-extension slides stop short of full access but cost less and fit shallower cabinet openings.
Are soft-close drawer slides worth the upgrade when replacing?
Since you're already pulling the old hardware, soft-close slides add convenience for roughly $15-20 more per pair in 2026 with no extra labor. Most homeowners doing this repair upgrade at the same time.
How long does it take to replace drawer slides in a kitchen?
Each drawer takes 30-60 minutes once you've done the first one and know your cabinet's mounting pattern. A full kitchen of 12 drawers typically runs 6-10 hours across a weekend.
Why does my new slide not fit the old screw holes?
Different manufacturers space mounting holes differently, even at the same slide length. Drill new pilot holes offset from the old ones rather than forcing a mismatch, and fill the unused holes with wood filler.
One last thing
Most of the labor in this repair isn't the screwdriver work — it's measuring the old slide correctly before you order. Get the length and mount type right and the install itself takes less time than driving to the hardware store and back.


