

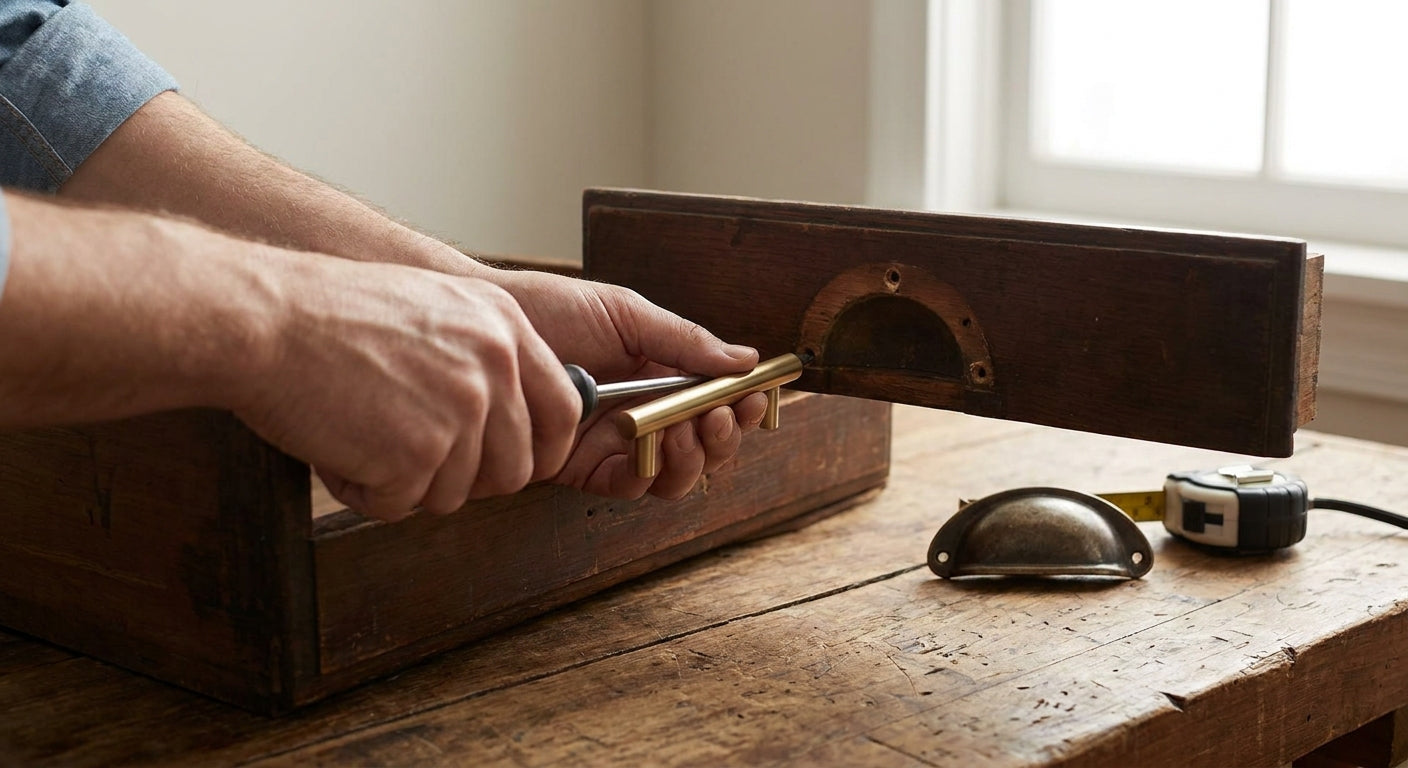
Swapping cup pulls for bar pulls without redrilling comes down to one number: the center-to-center (cc) spacing of your existing holes has to match the cc spacing stamped on the new pull's spec sheet, within about 1/16 inch of tolerance.
- Match your cup pull's center-to-center spacing to a bar pull's cc spec before you buy anything.
- Most kitchen cup pulls sit at 3-inch, 3 3/8-inch, or 4-inch cc in 2026 stock cabinetry.
- A backplate hides up to 1/8-inch of spacing mismatch without touching a drill.
- Dry-fit with the old screws first; bar pulls ship with standard 8-32 hardware but drawer thickness varies.
Why this matters
Redrilling a drawer front is the single most common way a hardware upgrade goes wrong. One stripped pilot hole or one hole that's a hair off center, and you're staring at a visible gap that no amount of touch-up paint fixes cleanly.
Cup pulls and bar pulls both mount on two screws set a fixed distance apart, so the physics of a no-drill swap is simple: find a bar pull with the same cc measurement as your cup pull, and the existing holes do all the work. The trick in 2026 is that manufacturers don't standardize cup pull spacing the way they do knob sizing, so you're measuring your own drawers, not trusting a universal chart.
What you'll need
- A tape measure or digital calipers (calipers get you the 1/16-inch accuracy this job needs)
- Painter's tape and a pencil
- A screwdriver or drill/driver for removing the old cup pulls
- The new bar pulls, chosen only after you've confirmed cc spacing
- Wood filler and matching touch-up paint, on standby but not guaranteed to be needed
- A guide for measuring cabinet pull hole spacing if you've never pulled calipers on a drawer front before
If your cup pulls were installed before 2010, measure twice. Older stock cabinetry ran non-standard spacing far more often than anything built after 2015.
The steps
1. Measure your existing cup pull spacing
This single measurement determines every other decision in the project. Remove one cup pull, then measure screw-hole center to screw-hole center, not edge to edge — that distinction is where most DIYers get tripped up.
Write the number down in both inches and millimeters, since some bar pull lines list spec in metric. Common cup pull spacing in kitchen cabinetry runs 3 inches, 3 3/8 inches, or 4 inches, but nothing stops a custom cabinet shop from drilling something else entirely.
Common mistake: measuring from the outer edge of the mounting holes instead of dead center. That error alone can throw you off by 3/16 inch, which is enough to force a redrill you were trying to avoid.
2. Shop bar pulls by cc spacing, not by look
Once you have your number, cross-reference it against listed bar pull specs before you fall in love with a finish. A pull like the Elements Torino 4-inch center-to-center bar pull tells you the spacing right in the model name — that's the level of specificity you're hunting for across any brand.
Don't assume two pulls that look identical share the same cc. Two bar pulls can look nearly indistinguishable on a product page and still differ by half an inch in mounting spacing.
Common mistake: ordering based on overall pull length instead of cc spacing. A 6-inch-long bar pull can be drilled at 3-inch, 4-inch, or 5-inch cc — the outer length tells you nothing about where the screw holes actually land.
3. Dry-fit before you commit
Hold the new bar pull against the drawer front, threading the original screws through loosely without tightening. This confirms cc match and lets you check that the pull's profile clears any curvature left behind by the cup pull's inset shape.
Cup pulls sit recessed into a shallow curve; bar pulls mount flush. If the old cup pull left a visible shadow line or slight indentation, a flush bar pull can expose it under kitchen lighting.
Common mistake: skipping the dry-fit and tightening straight to final torque. If the spacing is off by even 1/16 inch, forcing the screws can crack the drawer front, especially on MDF or thin overlay fronts.
4. Handle spacing mismatches with a backplate, not a drill
If your measurement lands between standard sizes, or the bar pull you want is off by up to 1/8 inch, a backplate for knobs and pulls can bridge the gap without touching the wood. The backplate mounts on the existing holes and gives the bar pull's feet a wider surface to land on.
This only works for small mismatches. Past roughly 1/8 inch, no backplate hides the problem and you're back to a redrill or a different pull entirely.
Common mistake: buying a backplate sized to the pull instead of sized to bridge the gap. Measure the backplate's own mounting holes against your drawer holes first.
5. Install with the right screws for your drawer thickness
Bar pulls generally use standard 8-32 machine screws, but drawer front thickness varies from 5/8 inch on stock cabinetry to over 1 inch on custom millwork. Too-short screws leave the pull loose; too-long screws bottom out and crack the interior face.
Hand-thread each screw fully before using a driver, and stop the moment you feel resistance. Over-torquing a bar pull into MDF strips the thread and turns a five-minute swap into a repair job.
Expected outcome: a pull that sits flush with zero wobble when you press down on either end.
6. Only fill holes that genuinely show
If the cup pull's footprint was wider than the bar pull's base plate, you may have a sliver of exposed hole on either side. Don't reach for filler reflexively — check first whether the bar pull's plate or a matching backplate already covers it.
When filler really is needed, a guide to filling and refinishing old cabinet hardware holes walks through matching stain and sheen so the patch doesn't stand out under kitchen lighting.
Common mistake: filling holes before confirming final pull placement. Once filler cures, you've lost the option to shift position by even a fraction of an inch.
Troubleshooting
- Spacing is off by more than 1/8 inch: stop and redrill, or choose a different pull. No amount of backplate coverage saves a mismatch that large.
- New pull sits proud on one side: the drawer front has a slight warp or the cup pull left an indentation. A thin shim washer under the low side levels it out.
- Screws strip on the first turn: the pilot hole enlarged from years of cup pull vibration. Switch to a slightly longer screw with more thread engagement, or add a threaded insert.
- Finish doesn't match across the kitchen: cup pulls and bar pulls from different brands rarely share identical plating even when both are labeled the same finish name. Order a sample of both before committing to a full set.
- Bar pull flexes when pulled: this points to a base plate too thin for the drawer material, common on lightweight bar pulls mounted to solid hardwood fronts. Move up to a heavier-gauge pull rated for the material.
- Gap visible around the base plate: the cup pull's recessed cut was wider than the new pull's footprint. A backplate is the fix here, not filler, since filler alone won't create a clean edge.
Tools and resources
- Digital calipers or a tape measure accurate to 1/16 inch
- The measuring guide above for a full walkthrough of technique
- A backplate reference if your spacing lands between standard sizes
- 8-32 machine screws in a couple of lengths, since drawer thickness varies across a kitchen
- Wood filler matched to your cabinet finish, kept on hand but used only when the dry-fit shows a real gap
What to do next
Once every drawer is converted, check that placement is consistent room to room — a cabinet hardware jig for perfect placement keeps every remaining pull at the same height and offset as the ones you just swapped, which matters more than the pull style itself when someone walks into the kitchen.
FAQ
Can you convert cup pulls to bar pulls without redrilling?
Yes, as long as the bar pull's center-to-center spacing matches the existing cup pull holes within about 1/16 inch. Mismatches up to 1/8 inch can be bridged with a backplate; anything larger requires new holes.
What is the standard spacing for cup pulls?
Kitchen cup pulls commonly run 3 inch, 3 3/8 inch, or 4 inch center-to-center in cabinetry built after 2015. Older or custom cabinetry can use non-standard spacing, so measure your own drawers before ordering.
Do bar pulls fit the same holes as cup pulls?
They fit the same holes only when the cc spacing matches exactly. Bar pulls and cup pulls both use two mounting screws, so matching spacing is the only requirement for a direct swap.
How do I measure cup pull hole spacing?
Measure from the center of one mounting screw hole to the center of the other, not edge to edge. Calipers give more accurate results than a tape measure for this 1/16-inch-sensitive measurement.
What screws do bar pulls use?
Most bar pulls mount with standard 8-32 machine screws, but the correct length depends on your drawer front thickness, which ranges from about 5/8 inch on stock cabinetry to over 1 inch on custom millwork.
Can a backplate fix mismatched hole spacing?
A backplate bridges spacing mismatches up to about 1/8 inch by giving the pull's mounting feet a wider surface to land on. Past that gap, a backplate won't hide the mismatch and a redrill becomes necessary.
Is it cheaper to convert cup pulls to bar pulls than to redrill?
Converting without redrilling avoids filler, paint touch-up, and the risk of a visible repair mark, which makes it the lower-cost and lower-risk path whenever spacing allows it. Redrilling is only cheaper in materials, not in time or finish risk.
Will a bar pull cover an old cup pull's shadow line?
A flush-mounted bar pull will not always cover the shallow indentation a recessed cup pull leaves behind. Check under direct light during the dry-fit step before finishing the install.
One last thing
The detail that trips up most people isn't the drilling at all — it's the recessed curve a cup pull leaves in the wood. A flat bar pull sits proud against that curve unless you dry-fit first and catch it before final install, and no product spec sheet warns you about it because it's a function of your specific drawer, not the hardware.