

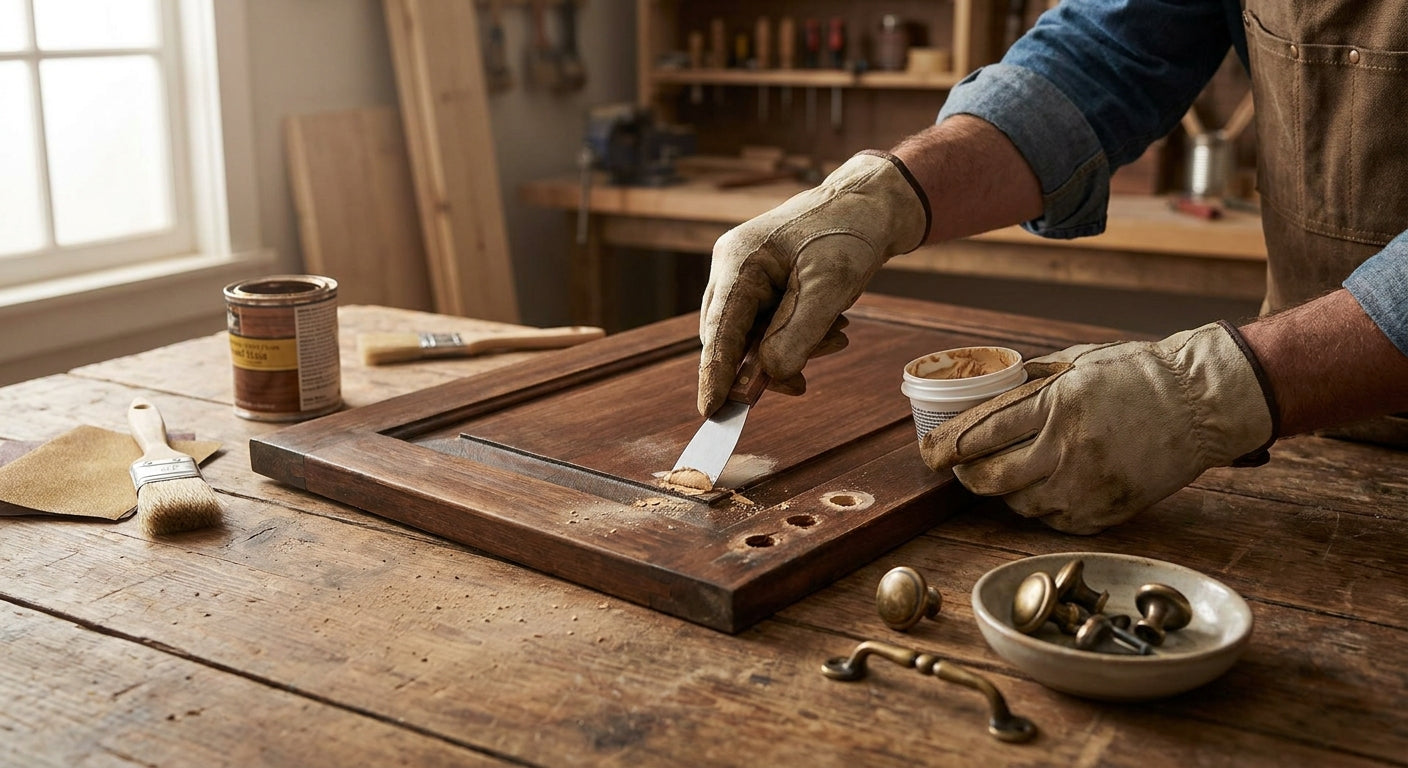
Old hardware holes don't have to sideline a cabinet refresh — with the right filler, cure time, and a redrilling jig, you can fill cabinet hardware holes cleanly and hang new knobs or pulls in a different spot without a trace of the old ones.
Shop backplates
Backplates cover old drill holes without filling — filter by size, finish, and brand.
Browse Backplates →TL;DR
Filling cabinet hardware holes takes three materials — wood filler or two-part epoxy, 220-grit sandpaper, and matching paint or stain — plus a 24-hour cure window before you touch sandpaper to the surface. For most homeowners swapping hole spacing (say, going from a single knob hole to a 5-inch pull), a two-part epoxy wood filler is the Buy because it won't shrink or crack the way single-part fillers can over 2026's humidity swings. Skip spackle — it's built for drywall, not cabinet doors that flex and get wiped down daily. Once filled, use a cabinet hardware jig to drill new holes with zero guesswork.
Why this matters
A botched hole-fill job shows up the moment light hits the cabinet door at an angle — a shadow, a slightly proud filler dot, a paint mismatch. That's the difference between a quick material fix and a full door replacement.
The other reason to get this right: new hardware almost never matches old hole spacing exactly. A cabinet that had a single 1-3/8 inch knob hole won't magically fit a pull with 5-inch center-to-center screws. You're filling the old hole and drilling a new one, on the same door, and both have to disappear under the same finish.
What you'll need
- Two-part epoxy wood filler (or a solvent-based wood filler for stained wood)
- Putty knife or plastic scraper
- 220-grit and 320-grit sandpaper
- Tack cloth or a damp microfiber rag
- Primer matched to your cabinet material (if painting)
- Paint or stain matched to the existing finish
- A cabinet hardware jig for the new hole layout
- A drill with a bit sized to your new hardware's screw shank (usually 3/16 or 1/4 inch)
- New knobs or pulls, already unboxed so you know the exact screw length and spacing before you drill
If you haven't pulled the old hardware off yet, do that first — see how to remove old cabinet hardware without damaging cabinets before you touch a filler tube.
The steps
1. Clean and rough up the hole
Wipe out sawdust, grease, and old screw threads with a rag dipped in mineral spirits. Run 220-grit sandpaper around the inside edge of the hole to give the filler something to grip — smooth, glossy holes are the number-one reason filler pops out later.
Common mistake: skipping this step on painted cabinets. Filler bonds poorly to slick latex paint, and you'll see a hairline crack within a few months.
2. Choose your filler based on the material
For painted cabinets, a two-part epoxy wood filler is the strongest option — it cures hard in about 15 minutes and won't shrink back into the hole the way single-part fillers do. For stained or clear-coated wood, use a solvent-based wood filler in a shade close to your wood tone, since epoxy doesn't take stain evenly.
| Filler type | Cure time | Best for | Shrinks? |
|---|---|---|---|
| Two-part epoxy | 15-30 min | Painted cabinets | No |
| Solvent-based wood filler | 2-4 hrs | Stained wood | Minimal |
| Wood dowel + glue | 24 hrs (glue) | Deep holes, structural gaps | No |
| Spackle | N/A | Never use on cabinets | Yes — skip it |
3. Pack the hole fully
Overfill slightly — press the filler in with a putty knife at a slight angle so it pushes into the full depth of the hole, not just the surface. Air pockets under a thin filler skin are what cause dimples after sanding.
For holes deeper than 3/4 inch, glue in a 3/8-inch wood dowel first, let it cure 24 hours, then trim it flush before adding a thin layer of filler over the top. This gives you real wood to sand and finish instead of a filler plug that's prone to cracking.
4. Let it cure the full time — don't rush this
Epoxy filler is workable in 15-30 minutes but isn't fully cured for sanding until it hits its full hardness, usually within an hour. Solvent-based filler needs 2-4 hours minimum, and dowel-and-glue repairs need a full 24 hours. Sanding too early smears soft filler across the surrounding wood grain.
Common mistake: sanding a still-tacky epoxy patch. It gums up the sandpaper and drags a haze across the surrounding finish that's hard to buff out.
5. Sand flush in two passes
Start with 220-grit to knock down the bulk of the filler, then finish with 320-grit for a smooth surface that won't telegraph through paint. Sand in the direction of the wood grain, not across it, and check the surface at a low angle under a work light — that's how you'll catch high spots before primer does.
6. Prime and finish to match
Spot-prime the filled area with a stain-blocking primer if painting, then blend the topcoat across the full door rather than just the patch — a patch-only touch-up almost always reads as a slightly different sheen once it's dry. For stained cabinets, test your stain match on the dowel plug in an inconspicuous spot first.
7. Measure and mark the new hole layout
Measure your new hardware's screw spacing — a pull might be 5-1/16 inches center-to-center, a knob is a single point — and mark the new position using a cabinet hardware jig rather than a tape measure alone. Jigs remove the guesswork on repeat holes across a full kitchen, which matters when you're drilling 20+ doors and drawers in 2026 and one crooked hole means starting this whole process over.
If you're unsure what spacing your new hardware needs, check how to measure cabinet pull hole spacing before you commit to a drill bit.
8. Drill and install
Use a bit matched to the screw shank diameter, drill from the front of the door to keep the exit hole on the back clean, and back the door with a scrap block to prevent tear-out. Install the new hardware and check for wobble — a loose fit means the hole is oversized and needs another round of filler.
Verdict on the whole process: treat it as a two-session job. Buy the two-part epoxy route if you're painting; Consider the dowel-and-glue method for stained wood with deep holes; Skip spackle entirely, it's not built for this.
Skip the filler: hardware that covers old holes
Filling and redrilling is not the only path to new hardware. If the new piece fully covers the old opening, you can skip patching altogether.
A backplate sits behind a knob or under a pull's base and covers the entire old hole, screw threads included. As long as the backplate's footprint is larger than the old opening, the new screw goes through the same hole and nothing needs to be filled, sanded, or repainted.
The other shortcut is matching drill-center spacing instead of the backplate route. Cabinet and vanity pulls come in standard spacings, including 3 inch, 96mm, and 128mm center-to-center, and if your old holes already match one of those, a new pull in that same spacing lines up without touching a filler tube. We carry pulls in every standard drill-center spacing, so measure your existing holes before assuming a patch is required.
This approach beats patching whenever you want to avoid repainting a door, or when the door material does not take filler well in the first place. Stock vanities are the clearest example, and that's covered next.
Filling knob holes in a stock vanity
Stock vanities are usually thermofoil or laminate over particleboard, not solid wood or painted MDF, and that changes what filler will actually hold.
Thermofoil is a vinyl film heat-wrapped over the substrate. Wood filler and two-part epoxy do not bond to that film the way they bond to bare wood or painted MDF, so a patch on a thermofoil door tends to lift, crack, or telegraph through the vinyl within months. On these doors, covering the hole with a backplate or a matched-spacing pull holds up better than patching.
Painted MDF vanity doors behave like painted cabinet doors: a two-part epoxy filler holds, sands flush, and takes primer and paint normally. Solid wood vanity doors follow the same rule as any stained cabinet door — a wood plug or dowel, glued and trimmed flush, holds stain more evenly than filler alone.
| Vanity material | Filler that holds | Better option |
|---|---|---|
| Thermofoil or laminate | Not reliable | Backplate or matched-spacing pull |
| Painted MDF | Two-part epoxy filler | Sand, spot-prime, paint |
| Solid wood, painted | Two-part epoxy filler | Sand, spot-prime, paint |
| Solid wood, stained | Wood plug or dowel | Glue, trim flush, match stain |
Whichever filler you use on a vanity, apply it from the back of the door with tape across the face side. That keeps the front surface flat instead of leaving a shallow dish once the filler sets. Lay out the new hardware with a template before drilling, so the new holes land clear of the old patch instead of overlapping it.
Troubleshooting
- Filler shrank and left a dimple — you used a single-part filler in a deep hole. Add a second thin coat once fully cured and resand.
- Paint over the patch looks shinier or duller than the rest of the door — you only touched up the patch instead of blending the topcoat across the full panel edge to edge.
- New screw won't tighten — the redrilled hole is slightly oversized from drill wander. Back it out, add a dab of wood glue, let it set 10 minutes, and re-drive the screw.
- Stain patch looks blotchy — solvent-based filler absorbs stain differently than surrounding wood. Test on scrap or the trimmed dowel end before applying to the visible face.
- Hairline crack appeared a few weeks later — the hole wasn't roughed up before filling, or the door flexes near a hinge and stresses the patch. Re-fill with epoxy, which handles minor flex better than rigid wood filler.
- Old finish doesn't match new paint even after priming — cabinet finishes yellow over time; a full-door repaint reads more even than a spot match, especially on doors older than 10 years.
Tools and resources
- Two-part epoxy wood filler or solvent-based wood filler, sized to your project
- 220 and 320-grit sandpaper, tack cloth
- A drill with bits matched to your new hardware's screw shank
- A cabinet hardware jig for repeatable spacing across multiple doors
- New hardware from Knobs.co, where the finish, spacing, and screw length are listed on every product page so you can confirm fit before you drill — see how to choose the right cabinet knob size if you haven't picked new hardware yet
Confirm your new hardware's exact screw length and finish on the product page before you commit to a new hole layout.
What to do next
Once the holes are filled, cured, and the new hardware is test-fit, move on to actually mounting it — see how to install cabinet knobs on drawers for torque and screw-length specifics so you don't strip a freshly filled hole on install day.
FAQ
What's the best filler for cabinet hardware holes? Two-part epoxy wood filler is the best option for painted cabinets in 2026 because it cures hard in under 30 minutes and resists shrinking. For stained wood, use a solvent-based filler matched to your wood tone instead.
Is wood filler better than a dowel for filling cabinet holes? Dowels work better for holes deeper than 3/4 inch or on structural areas near hinges, since they give you solid wood to sand rather than a filler plug. For shallow surface holes, filler alone is faster and holds up fine.
How long does cabinet hardware filler need to cure before drilling new holes? Epoxy filler needs about an hour to fully harden; solvent-based filler needs 2-4 hours; dowel-and-glue repairs need a full 24 hours before sanding or drilling nearby.
Can I fill cabinet hardware holes without repainting the whole door? You can spot-prime and touch up, but a full-door repaint blends more evenly, especially on cabinets with any age or sun exposure on the finish.
Do I need a jig to drill new cabinet hardware holes? A jig isn't required for a single knob, but it's the fastest way to keep spacing consistent across a full kitchen — especially with pulls, where a quarter-inch of drift is visible from across the room.
What screw size do I need after filling and redrilling? Match the screw to the shank diameter listed on your new hardware's product page — most cabinet knobs and pulls use 8-32 machine screws, but length varies by door thickness.
How much does it cost to fill and refinish cabinet hardware holes? Materials for filler, sandpaper, and primer cost far less than the paint or stain that follows, which is the real cost driver if you're repainting full doors instead of just patching.
Will filled holes be visible under new hardware? No, if the new hardware's backplate or base covers a slightly larger footprint than the old hole — check the base diameter on the product page before you finalize hole placement.
One last thing
If you're moving from a single knob to a pull, drill the new holes about 1/2 inch away from the old filled spot rather than dead-center over it — filler holds paint and primer fine, but it's still slightly less dense than solid wood, and centering a new screw hole directly over old filler risks a weaker grip over years of daily use.


