

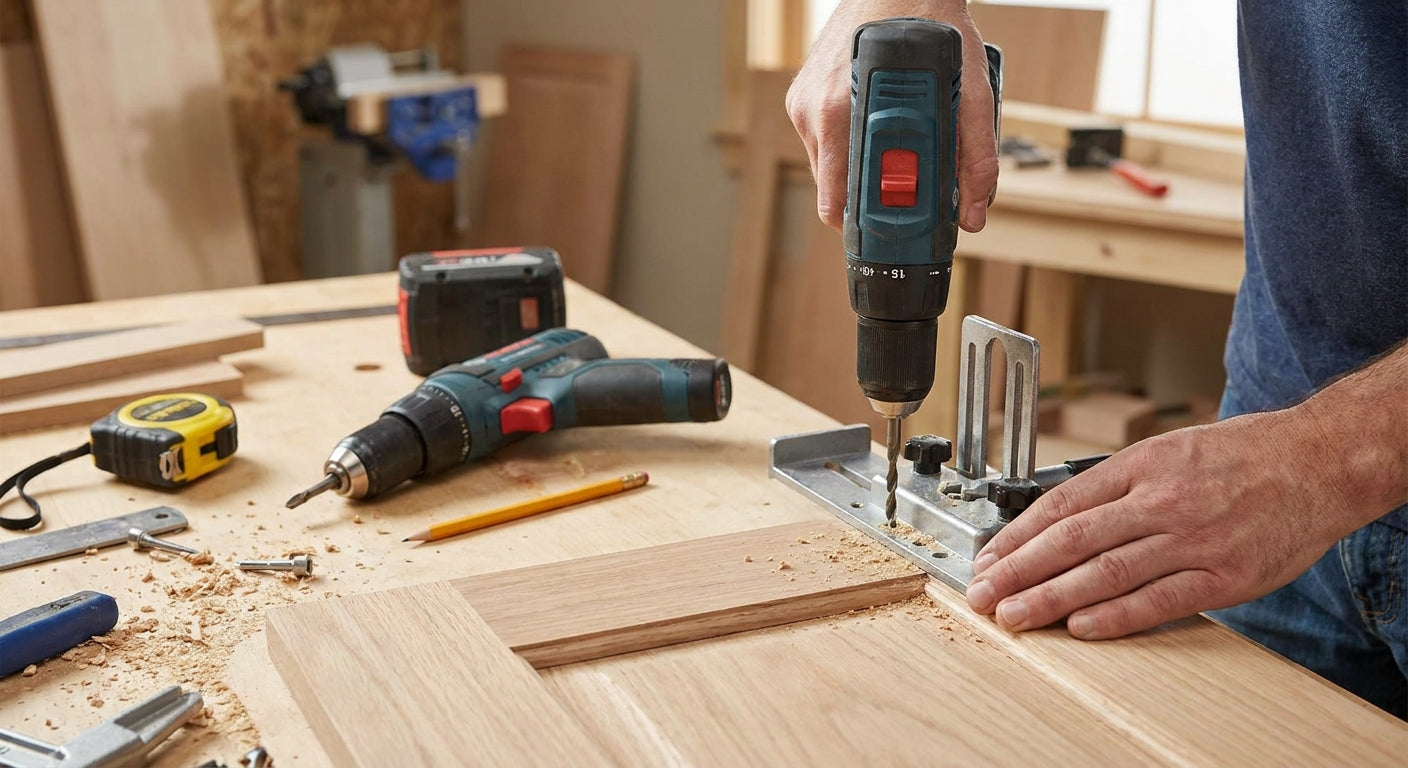
A hardware jig turns cabinet knob and pull installation from a guessing game into a repeatable job that takes about 5 minutes per door. This guide covers picking the right jig, setting it up, drilling clean pilot holes, and fixing the mistakes that show up when someone skips a step in 2026.
- Knowing how to use a hardware jig right cuts cabinet knob installs to about 5 minutes per door in 2026.
- Belwith's Mounting Templates Collection, $16.80, handles doors and drawers without redrilling mismatched holes.
- Skip a jig only for a single one-off drawer; anything past 4 doors needs one to stay consistent.
- Most jig mistakes trace back to a skipped centerline mark, not a faulty tool.
Why This Matters
Cabinet hardware sits at eye level on every door and drawer in a kitchen or bath, so a hole off by 1/8 inch reads as sloppy from across the room. A jig fixes the one variable that wrecks most DIY installs: hand-measuring drift that compounds door after door. Across a 20-door kitchen, hand measuring almost always leaves at least one pull visibly crooked next to its neighbors.
Knobs.co sells cabinet hardware to homeowners and contractors who need every knob and pull aligned the same way across dozens of doors, and for a full guide on the tool itself, the cabinet hardware jig walkthrough covers jig types in more depth than this piece does. A jig, not a steadier hand, is what actually solves the consistency problem.
What You'll Need
- An adjustable mounting jig or template rated for both doors and drawers
- Drill with 3/16" and 1/8" bits
- Pencil or fine-point marker
- Tape measure or calipers to confirm hardware spacing
- Painter's tape, for edge grip and chip-out control
- The actual knobs or pulls you're installing — hole spacing varies by product, so confirm it before setting the jig
The Steps
1. Confirm Your Hole Spacing First
Measure the hardware itself, not the box. A 96mm pull and a 128mm pull need different jig settings, and mixing them up is the single most common jig error. Lay the pull flat, measure post-to-post with calipers, then dial the jig to that exact number before it touches a door.
Common mistake: eyeballing spacing off a similar pull already installed elsewhere in the kitchen. Finishes look identical across product lines, but center-to-center spacing rarely matches.
2. Anchor the Jig to the Door Face
Line the jig's edge guide flush against the door's stile or rail, then tape or clamp it down. Any gap between the jig edge and the door edge shifts every hole in the same direction, so one loose jig ruins the whole cabinet run, not just one hole.
Painter's tape holds fine on standard doors; use a clamp on anything past 3/4" thick.
Common mistake: trusting friction alone on melamine or high-gloss doors. Smooth surfaces let the jig creep mid-drill without you noticing until the second hole is already off.
3. Mark Before You Drill
Push a pencil through the jig's guide hole and mark the door before committing a bit to wood. It costs ten seconds and lets you confirm placement against the door's rail before drilling anything permanent.
Common mistake: drilling straight through the guide on the first hole of a brand-new setup with no test mark. A jig set 1/16" off still looks fine on door one — it's obvious by door eight.
4. Drill With a Depth Stop
Set a stop collar or a tape flag on the bit at the door's exact thickness plus 1/8". Pulls generally need through-holes on drawer fronts; knobs on some inset doors need shallower depth to avoid blowing through thin veneer.
Common mistake: skipping painter's tape on the exit side. On painted MDF or veneer doors, the bit chips the visible face right as it breaks through — tape holds the fibers together during exit.
5. Test-Fit One Piece Before Repeating
Mount one knob or pull fully — screw it in, check backplate clearance and the reveal against the door edge — before drilling the rest of the run.
Common mistake: drilling every door first and mounting hardware last. That turns one bad jig setting into a full-kitchen redo instead of a five-minute fix.
6. Batch by Door Type
Hole spacing often differs between drawer fronts and doors in the same kitchen. Finish every door or drawer of one hardware type before resetting the jig for the next type.
Common mistake: switching between door and drawer settings mid-run. It's the most common cause of one mismatched piece in an otherwise clean install.
7. Countersink and Wipe Down
A light countersink on hardwood doors keeps backplates sitting flush instead of tenting slightly over the screw head. Run the countersink bit at low speed for a shallow bevel, then wipe sawdust off the door before mounting hardware so it doesn't scratch the finish during install.


Troubleshooting
- Jig shifted mid-drill, hole is off by more than 1/16". Stop immediately. Fill the hole with wood filler and redrill from a re-clamped jig rather than trying to angle a new hole through the old one.
- Pull doesn't sit flush after drilling. Check for a missing countersink — some hardware needs a beveled edge on the face side if the screw head isn't self-countersinking.
- Jig template doesn't match your hardware's spacing. Confirm center-to-center spacing on the hardware itself, not the box. Some brands print spacing in millimeters (128mm, 160mm) while your jig reads in inches — convert before setting.
- Doors and drawers end up with different reveal from the edge. Reset the jig's edge guide separately for drawers versus doors. Most kitchens use a different pull position on drawer fronts than on doors, and one jig setting doesn't cover both.
- Hole blew out the back face on a thin panel. Back the door with scrap wood clamped behind the drill point before drilling anything under 5/8" thick.
Tools and Resources
- Adjustable mounting jig or template, such as Belwith's Mounting Templates Collection
- 3/16" and 1/8" drill bits
- Stop collar or a painter's tape depth flag
- Countersink bit
- Tape measure and calipers for spacing verification
If you're also planning to swap out hinges as part of the same project, the correct hinge choice matters as much as hole spacing — see the guide on choosing the right cabinet hinge for door-thickness and overlay considerations before you drill anything.
What to Do Next
Once every door and drawer front is drilled and one piece is test-fit, the rest of the job is repetition: same jig setting, same door type, same batch. Confirm screw length matches your door thickness before final mounting — a screw that's too long will poke through a thin panel, and one that's too short leaves hardware loose within a season. Check spacing one more time on the first drawer front before switching jig settings, since that's the point most installs go sideways.
FAQ
How do you use a hardware jig on cabinet doors?
Set the jig to match your hardware's exact center-to-center spacing, clamp or tape it flush against the door edge, mark through the guide holes with a pencil, then drill with a depth stop. Test-fit one piece before repeating across the rest of the doors.
What's the best jig for both doors and drawers?
An adjustable template rated for multiple hole spacings, like Belwith's Mounting Templates Collection at $16.80, works across doors and drawer fronts without needing a separate tool for each.
How much does a cabinet hardware jig cost?
Basic drill templates run roughly $8 to $17 as of 2026, with adjustable multi-spacing jigs at the higher end of that range. Most include a 3/16" drill bit.
Is a hardware jig better than measuring by hand?
Yes, for anything past a single door or drawer. Hand measuring introduces drift that compounds across a kitchen, while a jig holds the same spacing on door one and door twenty.
Do I need a different jig setting for drawers versus doors?
Usually. Most kitchens use a different pull position on drawer fronts than on doors, so the jig's edge guide needs to be reset between the two rather than reused as-is.
What causes a hole to come out off-center with a jig?
Almost always a jig that shifted during drilling, usually from friction alone on a smooth door surface. Clamping the jig instead of relying on tape prevents most of this.
Can I use a hardware jig without a drill press?
Yes, a standard hand drill works fine as long as you use a depth stop or tape flag to control how far the bit travels through the door.
What screw length should I use with a jig-drilled hole?
Screw length depends on door thickness plus the hardware's post length, not a fixed number, so measure the door before ordering hardware.
One Last Thing
The jig itself rarely causes a bad install — the centerline mark does. Nearly every crooked pull traced back through a project started with someone trusting the jig's first position without a pencil test mark first. Add that ten-second step and the rest of the process holds up across as many doors as the kitchen has.