

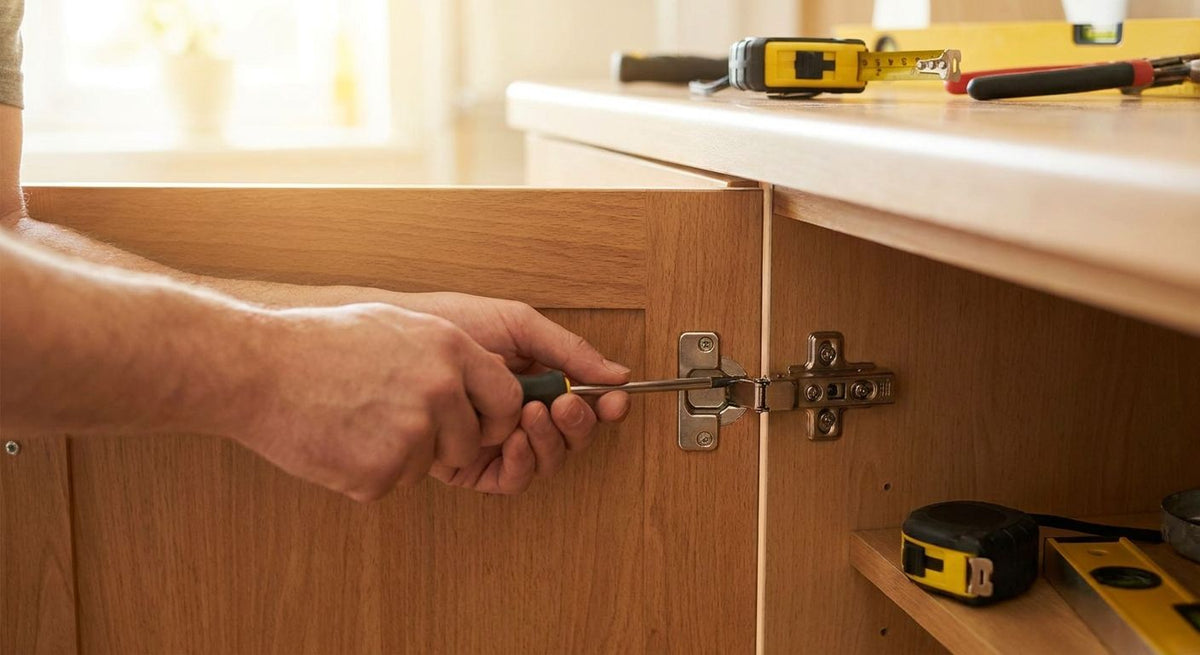
Cabinet doors go crooked because a hinge screw loosened, not because the hinge failed — and fixing it means turning the height, depth, and side screws on the hinge cup arm, not buying new hardware. Most doors installed after 2000 use three-way adjustable European concealed hinges, so the fix takes a screwdriver and about five minutes per door. A door that still won't sit flush after all three screws are maxed out has a warped panel or a stripped screw hole, and no amount of hinge adjustment fixes either one.
Shop cabinet hinges
Every cabinet hinge we carry, in one place — filter by overlay, mount type, and brand.
Browse Cabinet Hinges →- Adjusting cabinet hinges for door alignment means turning the height, depth, and side screws on the hinge cup arm — no new hardware needed.
- European concealed hinges give three-way adjustment; older face-frame butt hinges usually don't adjust at all.
- A door that stays out of flush after adjustment usually has a stripped screw hole or a warped panel, not a hinge problem.
- Knobs.co stocks replacement self-closing hinges and mounting templates for when adjustment can't fix the gap.
Why this matters
A crooked door isn't just cosmetic. Once it rubs the frame or catches on the door next to it, the finish wears through at the contact point and the hinge takes more stress every time someone forces it shut. Left alone long enough, a rubbing door chips paint, cracks veneer, and eventually needs the hinge cup re-bored — a bigger job than a five-minute fix with a screwdriver.
Most alignment problems in 2026 kitchens trace back to one of three screws on the hinge arm, and most homeowners never touch them because nobody points them out. Before choosing the right cabinet hinge as a replacement, rule out a simple screw adjustment first — it solves the majority of door alignment complaints without spending a dollar. Contractors and designers juggling multiple units know this cost adds up fast across a full kitchen — one crooked door found during a final walkthrough is a five-minute fix if you catch it before the client does.
How do you adjust cabinet hinges for door alignment?
Open the door and look at the metal arm connecting the hinge cup (mounted inside the door) to the mounting plate (screwed into the cabinet box). Three screws on that arm control three directions of movement, and every European concealed hinge made since the late 1990s uses the same basic layout.
- Loosen — don't remove — the two mounting plate screws holding the hinge to the cabinet frame, giving the hinge slightly more play.
- Turn the height screw at the top of the hinge arm clockwise to raise the door, counterclockwise to lower it.
- Turn the depth screw, usually the one closest to the cup, to push the door toward the frame or pull it away — this controls the reveal gap.
- Turn the side screw to slide the door left or right along the mounting plate.
- Retighten the mounting plate screws and check the gap on all four sides before moving to the next hinge.
- Adjust the second hinge only if the gap still isn't even — most doors need one hinge tweaked, not both.
Work in quarter turns and recheck the gap after each one. Overturning a screw past its stop strips the plastic thread inside the mounting plate, and a stripped plate is the single most common reason a five-minute adjustment turns into a hinge replacement.
Do hinge brands adjust the same way?
Yes, with minor differences. Amerock, Blum, Salice, and most other major hinge makers all build three-way adjustment into their concealed cup hinges — a height screw, a depth screw, and a side screw — even though screw positions on the arm vary slightly between brands. The core logic stays the same: raise or lower with height, push or pull with depth, slide left or right with side. If you're not sure which screw is which on an unfamiliar hinge, turn each one an eighth of a turn and watch which direction the door moves before committing to a bigger adjustment.
Diagnosing the gap: which screw fixes which problem
Matching the symptom to the screw saves time and avoids stripping threads by guessing.
| Symptom | Screw to turn | Direction | Result |
|---|---|---|---|
| Door sits higher than the one next to it | Height screw | Counterclockwise | Lowers the door to match |
| Gap is wider at the top than the bottom | Depth screw | Pull door forward | Evens out the reveal |
| Door rubs the cabinet frame edge | Side screw | Toward the open side | Shifts door away from the frame |
| Door won't sit flush against the frame | Depth screw | Push door inward | Closes the gap |
| Door swings shut too hard or too fast | Not an alignment issue | — | Check hinge spring tension; replace if worn |
Most single-symptom problems resolve in one adjustment pass. Doors with multiple symptoms — high on one side and rubbing on another — usually need two screws touched in sequence, height first, then side.
Checking your work: measuring the reveal gap
Many cabinetmakers target a consistent gap of roughly 1/8 inch between doors and around the frame — the exact number matters less than consistency across every door in the run. A folded index card or a thin tape measure works fine for checking; slide it into the gap at the top, middle, and bottom of each door and adjust until it reads the same at all three points. Doors that taper from wide at the top to tight at the bottom (or the reverse) usually need the depth screw, not the height screw.
On a run of matching cabinets — like an island or a bank of drawers — sight down the row of doors at eye level. Even a hinge that measures fine with a tape can look off next to its neighbors.
European concealed hinges vs. face-frame butt hinges
Not every hinge adjusts. Older cabinets and some traditional face-frame builds use butt hinges that are fixed once installed — if the door sags on one of these, the fix is a shim or a hinge swap, not a screwdriver.
| Hinge type | Adjustable? | Best for | Verdict |
|---|---|---|---|
| European concealed (cup) hinge | Yes — height, depth, side | Frameless and overlay face-frame cabinets | Buy for easy realignment |
| Face-frame butt hinge | No | Traditional cabinetry with exposed hinges | Hold — replace if drift is frequent |
| Semi-concealed hinge | Partial, usually one or two screws | Mixed overlay doors on face-frame boxes | Hold |
If you're outfitting new cabinets in 2026, adjustable European hinges save a service call later. Installing European concealed hinges correctly on the first pass means fewer alignment complaints down the line, and inset doors carry their own boring depth rules worth checking before you drill.
Why cabinet door alignment drifts
Hinge screws don't loosen without a cause. Check for these before reaching for the screwdriver:
- Loose mounting screws from months of doors being slammed shut instead of eased closed.
- Seasonal wood movement — solid wood doors expand and contract with humidity, shifting the reveal gap between summer and winter.
- Heavy doors — glass-front or solid slab doors sag gradually on standard hinges that lack soft-close dampening.
- Hinge cup bored at the wrong depth during the original install, which no amount of screw adjustment corrects.
- Warped or bowed door panels — a twisted door won't sit flush no matter how the hinge is set.
- Worn-out hinge springs on older self-closing hinges that no longer hold the door's closing tension.
Fixing the cause matters as much as fixing the symptom. A door re-adjusted every few months without addressing loose screws or a heavy sag will keep drifting back.
Signs you need a new hinge instead of an adjustment
Adjustment fixes a door that's slightly off. It doesn't fix a hinge that's mechanically worn out. Even in 2026, replacing a worn hinge is still cheaper than repeat service calls. Replace the hinge instead of adjusting it again when:
- The screws are already maxed out in every direction and the door still won't sit flush.
- The door sags visibly within days of the last adjustment, pointing to a broken or fatigued spring.
- The mounting plate screw holes are stripped and won't hold a screw even hand-tight.
- The hinge cup itself is cracked, bent, or pulling away from the door.
A new self-closing hinge costs less than the time spent re-adjusting a worn-out one every few weeks, and it resets the adjustment range back to full.


What tools do you need for hinge adjustment
A Phillips or Pozidriv screwdriver covers nearly every European concealed hinge on the market — check the screw head before starting, since Pozidriv bits look similar to Phillips but slip on the cross pattern if you use the wrong one. No drill, jig, or specialty tool is needed for height, depth, or side adjustments. Even hinges sold in 2026 largely stick to the same Phillips or Pozidriv screw heads used for two decades. A mounting jig only comes into play when a hinge cup needs re-boring or a hinge is being replaced entirely, not for a standard realignment.
Why does my cabinet door not close all the way after adjusting the hinge?
A door that won't close fully after adjustment usually has the depth screw maxed out at its travel limit, meaning the hinge has run out of physical range in that direction. At that point the fix is a shim behind the mounting plate or a hinge with a wider adjustment range — not more turning.
Can you adjust a cabinet hinge without taking the door off?
Yes — all three adjustment screws sit on the hinge arm and mounting plate while the door stays hung, so a standard alignment fix doesn't require removing the door in 2026 or any other year. Only replacing the hinge or re-boring the cup calls for taking the door down.
Should you adjust both hinges on a door at the same time?
No — adjust one hinge, recheck the gap, then move to the second only if it's still uneven. Adjusting both at once makes it hard to tell which screw caused which change, and doubles the risk of overturning a screw past its stop.
How often should cabinet hinges be re-adjusted?
Cabinet hinges rarely need re-adjustment on a fixed schedule — most doors hold their setting for years once the mounting screws are properly tightened. Re-adjustment becomes routine only when a door is unusually heavy, humidity swings are severe, or the original hinge cup was bored slightly off from the start.
FAQ
What's the best way to fix a cabinet door that hangs crooked?
Adjust the height screw on the hinge arm first — clockwise raises the door, counterclockwise lowers it — then recheck the gap before touching the depth or side screws. Most crooked doors need only one of the three screws moved.
Which hinge screw controls which direction on a cabinet door?
The height screw at the top of the hinge arm raises or lowers the door, the depth screw nearest the cup pushes it in or out, and the side screw slides it left or right. All three sit on standard European concealed hinges made in 2026 and earlier.
Why won't my cabinet door close flush after adjusting the hinges?
A door that stays out of flush after adjustment usually has a screw maxed out at its travel limit, a warped door panel, or a hinge cup bored at the wrong depth. None of those problems respond to more turning — they need a shim, a new hinge, or a replacement door.
Is it normal for cabinet doors to need re-adjustment every few months?
No — a door needing frequent re-adjustment points to loose mounting screws, a heavy door on standard non-soft-close hinges, or humidity swings moving a solid wood panel. Fixing the underlying cause stops the repeat drift.
Can you adjust a cabinet hinge without removing the door?
Yes, the height, depth, and side screws are accessible with the door hanging in place, so a standard alignment adjustment takes a screwdriver and a few minutes per hinge. Removing the door is only necessary for replacing the hinge or re-boring the cup.
Do all cabinet hinges have adjustment screws?
No — three-way adjustable European concealed hinges are standard on most cabinets built after 2000, but older face-frame butt hinges are fixed once installed. A fixed hinge that's sagging needs a shim or a full replacement, not a screwdriver.
What tools do you need to adjust cabinet hinges?
A Phillips or Pozidriv screwdriver handles nearly every European concealed hinge adjustment — no drill or specialty tool required for height, depth, or side changes. A hinge mounting jig only comes into play when you're re-boring or replacing the hinge entirely.
One last thing
The depth screw is the one people over-turn first, and it's also the one most likely to strip the mounting plate thread when forced past its stop — back off the moment you feel resistance instead of pushing through it. A stripped mounting plate on an otherwise good hinge is one of the few alignment problems where hinge repair plates for stripped screw holes fix the cabinet box instead of forcing a full hinge swap — worth checking before you write off the whole hinge.


